Thursday, October 16, 2014

Drag Racing Baby Buggies!

My son and daughter-in-law are expecting a son in December, our first grandson. The moment I knew it was a boy (I got to be in the room for the sonogram!) I knew my baby shower theme would revolve around drag racing. My Dad is a drag racer, I've driven for 20 years, my son is a third-generation driver.  It's a little too early to know if this baby will be a fourth-generation driver but it's safe to say he will grow up attending a lot of races. Drag racing runs in my family's blood!

I've been planning and crafting for a few months now.  All this week I've had tasks lined up, trying to keep to my schedule so all will be ready on Saturday. I enjoy the process of planning and implementing a party, it satisfies the creative side of me. 

The invitations went out a month ago.
The sugar cookie gifts are ready to go.  We'll be drag racing baby buggies at this shower!
I tried to make the back tires look like racing slicks, not sure I succeeded.  Oh, well!

First to the finish line wins!

"Papa, pop a wheelie" was one of the things my young son would tell my dad!

Waiting for the tree!

Saturday, October 11, 2014

Wood-Fired Oven

My Hubbers rides a Harley as one of his hobbies.  In the biking world there is a saying that goes "it's not the destination, but the journey"; basically don't be so concerned about where you're headed to that you don't enjoy the ride along the way. Shouldn't life be like that, too?  We all know there will be an end to our life here on earth. Our goal in life should be enjoying the journey along the way, to follow our dreams, to dream big. There is something gratifying about working hard and having your dreams come to fruition.

For the last few years I've been dreaming of having a wood-fired outdoor oven. We (especially me) are homebodies, our house is our castle. I love to cook and bake, my Hubbers loves to socialize, so an outdoor oven appealed to me on many levels. After much "hemming and hawing" we bit the bullet and our oven is now finished! At first, this was my dream and my Hubbers just went along with me.  The inner caveman in him has emerged during this process (man + fire equals some sort of mystical combination!) and he is very excited about the oven, too.  I know we have a steep learning curve ahead of us but it will be fun, something that we can learn together.
We opted to have a masonry contractor build the oven, though I know many do it themselves. Our contractor is wonderful, he did our brick courtyard a few years back.  Watching him and his crew work is like watching a symphony, all the parts blending together, truly magical.  After seeing the process I'm glad we didn't attempt it on our own.  It would've taken us forever and our marriage may have taken a hit! It took three highly-qualified men four days to complete this oven! The process began with a concrete pad. A block frame was then constructed on top of the pad. Another layer of concrete was done and the actual oven dome (which is from Forno Bravo) was placed on top of it. Then the dome was insulated and surrounded by more block. Sand was poured between the dome and block walls to further insulate the oven. Finally this was all topped by more blocks to enclose the unit.  Brick was then applied to get the decorative finish we desired. Whew!
The Forno Bravo cooking dome and fire-brick oven floor. Looks rather like an igloo!

The block frame complete and ready for brick. The bottom area is for wood storage.
We have about two more weeks that the mortar needs to cure before we can start using the oven.  The mortar has to totally set so that the high heat the oven gets to won't crack it.  In addition, we have to start with small fires in the actual cooking dome, gradually building up to a full roaring fire over about a week time span. We think we will have our first meal from it the first of November.  In the meantime, I'm devouring cookbooks, website articles and YouTube videos, trying to learn as much as possible. Our first venture will be pizza, that seems to be an easy process, but anything can be cooked in the oven. Our future will hold many nights of various wood-fired meats, vegetables and, even, desserts coming from this oven. I'm anxious to bake bread in it and we plan to do a lot of entertaining.  I can't wait!

Thursday, October 9, 2014

Just Suppose...

Just suppose you have been spending a lot of time in the garden lately...pruning perennials, fertilizing, pulling out spent summer plants, tilling up the dirt, planting fall and winter annuals...and everything is looking pretty good and you're feeling pretty proud of yourself that you are on top of things....


...until there is a week of mid-90's and above temperatures. Wilty plants, dead plants, an entire flower bed that has to be replanted.

The temps will finally start dropping this weekend.  Back to the garden center I go for replacement plants!

Tuesday, October 7, 2014

Shrimp Scampi & Slacking

We have the 2013 tax deadline (for those on extension) looming on October 15 so my part-time hours have amped up some. I'm hosting a baby shower on October 18, lots of prep work involved.  I'm doing end-of-summer, beginning-of-fall gardening. I am busy, busy!  Dinners haven't been high on my priority list. Actually I don't mind cooking dinner, it's the grocery shopping I don't like finding time for! Too many nights we've gone out or eaten things like bacon and eggs. I've been feeling guilty about my dinner-slacking ways. This dish is easy and good.  I don't feel so guilty now!
This is an Ina Garten recipe (here). I deviated from the recipe by putting the shrimp in a baking dish and combining the butter and other ingredients, then topping the shrimp. I then baked in a 425 degree oven for 12 minutes.  Dinner was on the table in less than 30 minutes. There is plenty of buttery goodness to coat the pasta and the shrimp is cooked just right. We had a nice dinner and I had ample time in my craft room. Perfect evening!

Sunday, October 5, 2014

Halloween Gingerbread Houses - 2014 Edition

Cue the Visa commercial...

18 cups of flour
3 cups of butter
4 1/2 cups molasses
3 hours in the kitchen making dough, cutting and baking
2 hours in the kitchen assembling
over $50 in candy
time spent with my three granddaughters....priceless.

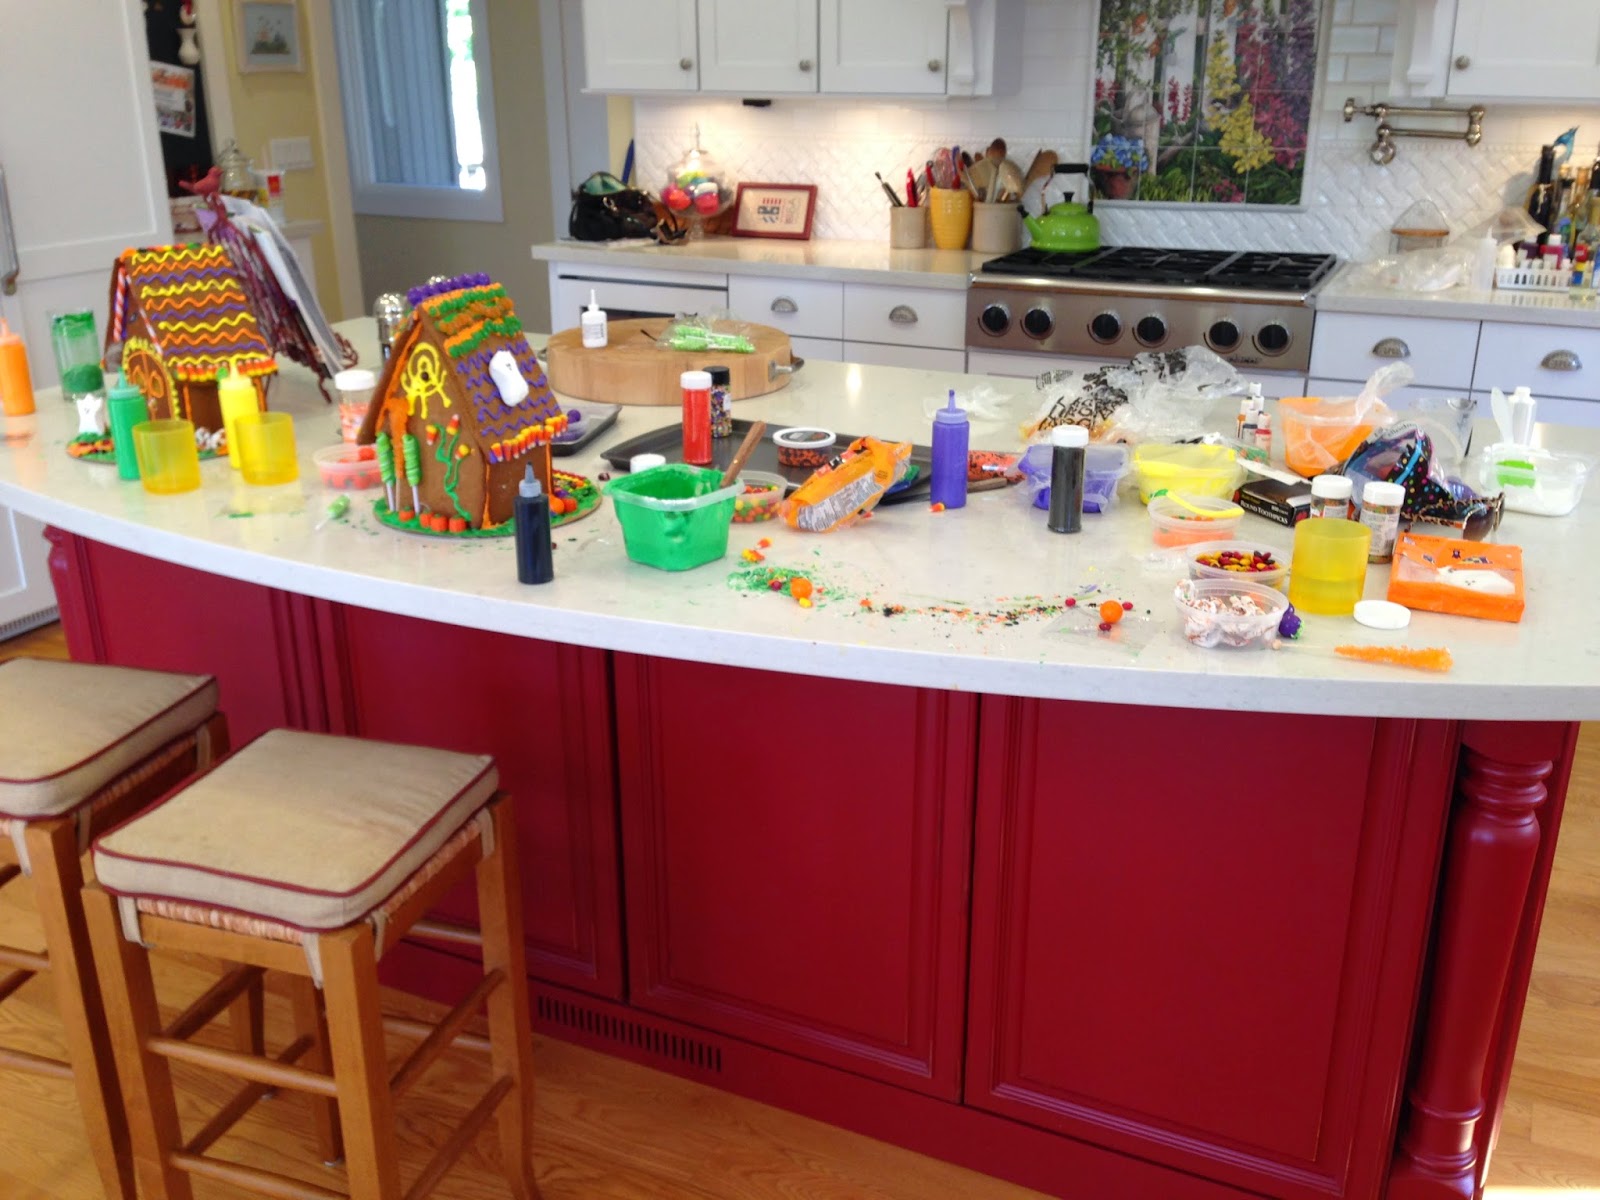
This is year five of our Halloween house decorating day. The first year it was just with the oldest granddaughter, last year we added the youngest. Three little girls, royal icing and bags of candy  makes for a crazy time! Last year it took me forever and a day to clean my kitchen after our decorating extravaganza.  Sprinkles, candy, royal icing on the floor, chairs, and every place in between made for a lot of clean-up work.  This year I thought I would be smart so set up the decorating station in our back patio.  I failed to take into account that (1) the morning sun shines directly in there and (2) we were in the beginning of a mid-90's day.  The sun was roasting us, the candy was getting sticky, the icing was sliding off the houses. So we packed everything up and moved back inside! Once again, I had a big mess to clean up but it was all worth it.
Ready to go to the patio.

My assistant supervising the royal icing mixing.


My girls ready to decorate!
 
I try to come up with new house designs each year to keep things interesting and exciting.  This house has a little Hansel & Gretel vibe to it.  I used mini pumpkin cookie cutters to cut out the door inserts.  Once the gingerbread had baked I filled the inserts with crushed candy and put back in the oven until melted.  Once cool, it makes a cute window effect.  One of these years we'll put some sort of lighting in the houses.

My husband, also know as Papa, was very instrumental in assembling the houses.  I did the cutting and baking, he did the bulk of the assembly. He has much more patience in that department than I do!


Grandchild #4 arrives in a few months.  In a few years we will be adding one more gingerbread house to our assembly process.  It's a lot of work to get the houses ready for the kids to decorate and there are moments I question my sanity in doing this.  That all disappears when the girls get here and they excitedly get to work.  I hope we are doing these houses for many years to come!
The aftermath!
I'm sharing at A Stroll Thru Life.

Thursday, October 2, 2014

The Fourth Quarter

“I'm so glad I live in a world where there are Octobers.” ― L.M. Montgomery

In the accounting world October marks the beginning of the year's fourth quarter. We spend a lot of time with our clients this time of year doing year-end planning and financial analysis. Another three months and it will be tax season (there are four seasons in my life...spring, summer, fall and tax season.) I have three months left of working part-time. Between now and the end of the year I have a baby shower to host, gingerbread houses to decorate, a Christmas tea to plan and host, along with all the holidays. The fourth quarter is going to fly by!
At home, October marks a change in our garden.  Gone are the roses, marigolds, all the summer flowers. In their place are pansies, cyclamens, primroses and the autumn-colored mums. And pumpkins.  We only have one, so far, but there will be more to come! I'm almost done with the fall gardening update work, have been spending a lot of time in the yard lately. October is such a wonderful month!

Saturday, September 27, 2014

Hungry Caterpillar Wrapping Paper

Baby shower season is starting in our family.  Our fourth grandchild, and first boy, is due in December. I've been buying and making presents for months now. The first shower was today. So. Much. Fun. 

I've been reading The Hungry Caterpillar to Granddaughter #3 a lot lately. We always do some crafting when she comes over so I thought it would be cute to make wrapping paper with caterpillars to tie into the book and also get her involved with the upcoming birth of her new cousin. Last night we got the supplies out and got to work. She had fun painting and we talked all about Baby Jakey, when she was going to get to hold him, how much longer he was going to be in his Mommy's tummy, how she was going to teach him to swim (not sure why this was so important!) We had a nice time chatting, laughing and painting.  And the wrapping paper turned out cute, too! We have a present ready so next time she is here we will grab out the tape and ribbon and wrap things up!
We used round stencil brushes to make the circle shapes of the caterpillar, very easy for little hands to deal with!

After the paint dried, we added legs and antennas with colored markers.