I'm a pretty organized person, some days I'm even more so. My life is very busy, I have a lot of activities that I juggle. Being organized helps keep all the balls in the air. It also saves time and energy. One area that I tend to slide on is meal planning and shopping. I'm one of those that is wondering what I'm cooking for dinner at 3 in the afternoon. I tell myself it's because I dislike shopping but that's really a lousy excuse because my lackadaisical attitude usually means I'm at the grocery store more frequently. I'm still a work-in-progress!
Recently we had a drag racing weekend. This involves living in our motorhome for 4-5 days. We are at the track 24/7 and going to the store is not an option, unless we have taken an extra vehicle. So I have to be very organized. I set up a daily meal plan (3 meals and snacks) and prepare shopping lists, as well as a list of items to take from home. Each day I know exactly what I'm going to cook and that I have the ingredients. Why, oh why, don't I do this on a regular basis at home?
In anticipation of these trips I also do some make-ahead cooking or baking. A few days before our trip I made a peach raspberry crisp for our dessert. I made a small crisp but the regular amount of topping, so froze half the topping in a freezer bag. This got thrown in the RV freezer during our packing. On the night I made the nectarine crisp all I had to do was prepare the fruit mixture, throw into a disposable pan (we have to ration our water in the RV, the less dishwashing the better!), and top with the previously-made topping. It took very little time and I had minimal kitchen clean up. Again, why, oh why, don't I do this on a regular basis?

Any fruit mixture will work good in this recipe. I was originally going to make another peach raspberry crisp but the nectarines at the fruit stand were so beautiful I had to buy them. I had frozen blueberries in the freezer and thought they would be a nice addition, they are so healthy. I figure anything that has a lot of sugar in the recipe needs some sort of healthiness to it!
Nectarine Blueberry Crisp
Filling:
2 pounds nectarines, sliced
1 cup blueberries (fresh or frozen)
1/4 cup sugar
2 teaspoons cornstarch
2 tablespoons orange juice
Topping:
3/4 cup flour
1/2 cup sugar
1/4 cup brown sugar
1/8 teaspoon salt
1/2 cup quick-cooking oatmeal
1/4 pound cold unsalted butter, diced
Preheat oven to 350 degrees. Butter (or use cooking spray) a 9x9-inch baking dish (double the recipe if you are using a larger dish).
In a large bowl, combine the nectarines and blueberries. Add the granulated sugar, cornstarch, and orange juice; mix gently. Pour the fruit mixture into the prepared baking dish.
In a large bowl, combine the flour, sugar, brown sugar, salt, and oatmeal. Cut the diced butter into the flour mixture using a pastry cutter or 2 knives.
Spread the topping over the fruit. Bake for 1 hour, until the top is browned and crisp and the juices are bubbly.
Each morning, after waking up, I head outside with Harley and check out the flower gardens. I hunt (and obliterate) snails, do a little weeding, deadhead flowers, fill up the bird feeders, water the potted plants. It's such a tranquil time of day, so quiet, not hot yet. It's one of my favorite times of the day.
This morning the sunflowers entranced me. Most have bloomed now. They are so bright and cheerful. In the mornings they face east, by the time I return home in the afternoon they have twisted west. The bees were all over the sunflowers this morning which thrilled me, too. There are problems with bees, they are dying off for unknown reasons. Planting flowers that attract bees, provides them pollen, is my way of helping to keep them viable.
These sunflowers will stay until late fall, when the stalks have dried as well as the seeds. We will have birds hanging all over the sunflowers trying to get to the seeds. I cut off the flower heads and place a few of them, at a time, near the birds' regular feeding station. They love them and it's quite entertaining to watch them feast. Sunflowers provide pleasure for humans and birds for many months!
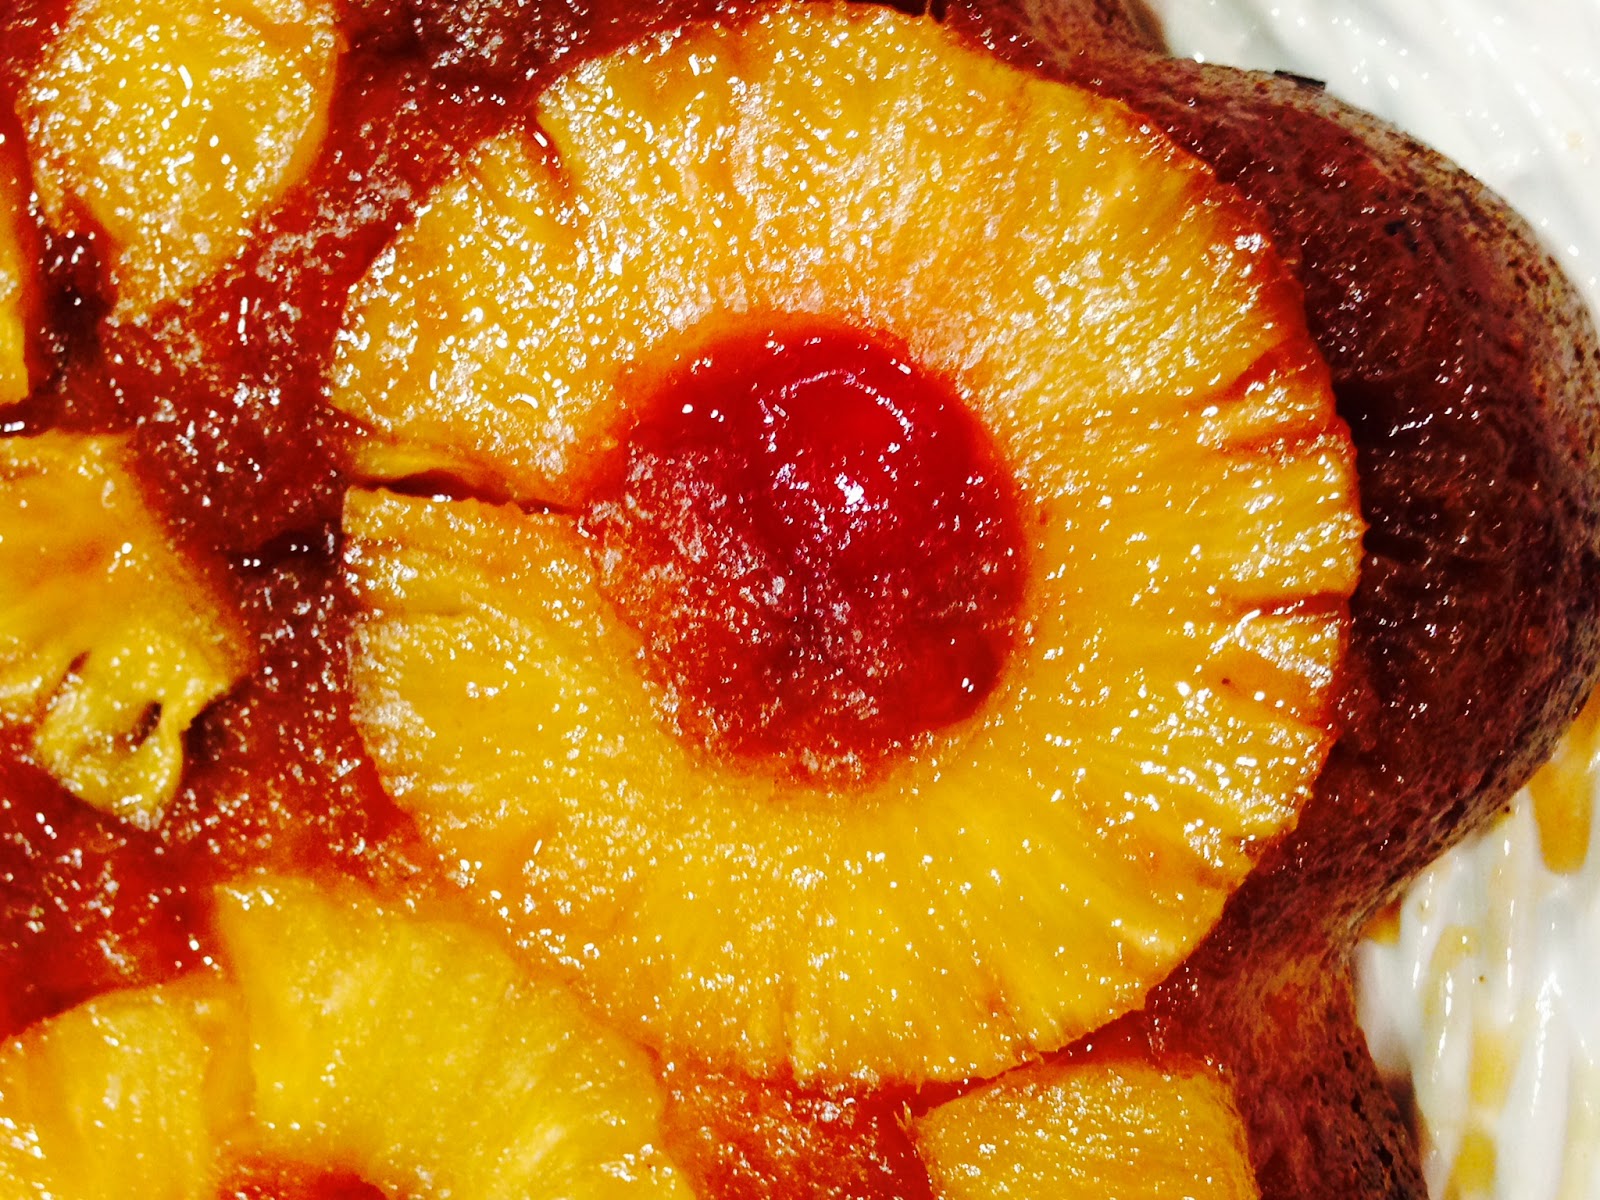
As I've said before, I get bored cooking and baking the same things. I'm always trying new recipes. My Hubbers, on the other hand, has his favorites and prefers that I include them in the rotation on a regular basis. Every now and then, he gets his wish! He loves pineapple upside-down cake. For dinner one night last week, I made halibut with a topping of tropical salsa which resulted in some unused pineapple. I put it in a bowl and started to put it in the fridge for another day. But those pineapple slices were calling me, telling me I needed to bake a cake. I listened, my Hubbers got his cake. I now have unused brownie points to be redeemed for my next household project! It all works out in the end!
This recipe is a little lighter than traditional pineapple upside-down cakes as the egg whites are beat separately from the yolks and lightly folded in. After turning out the cake, the buttery-brown sugar mixture oozes down the sides. It's decadent, yummy, old-fashioned food!
If you will notice I ran out of maraschino cherries. No one noticed, the cake was gone in a flash!
Pineapple-Upside Down Cake
1/3 cup butter
2/3 cup packed brown sugar
1 can (20 ounces) sliced pineapple **
3 eggs, separated
1 cup sugar
1 teaspoon vanilla extract
1 cup all-purpose flour
1 teaspoon baking powder
1/4 teaspoon salt
Maraschino cherries, if desired
** Or fresh pineapple slices and 1/3 cup pineapple juice
Preheat oven to 375 degrees. While preheating, melt butter in an ungreased 9-inch square baking pan. When butter is melted, remove pan from oven and stir in brown sugar until combined. Drain pineapple, reserving 1/3 cup juice. Arrange 9 pineapple slices in a single layer over sugar mixture (refrigerate any remaining slices for another use). Place a cherry in center of each pineapple slice, if desired.
In a large bowl, beat egg yolks until thick and lemon-colored. Gradually, add sugar, beating well. Blend in vanilla and reserved pineapple juice. Combine flour, baking power, and salt; add to batter, beating well.
In a small bowl with clean beaters, beat egg whites on high speed until stiff peaks form; fold into batter. Spoon into pan.
Bake 30-35 minutes or until toothpick inserted in center comes out clean. Let stand 10 minutes before inverting onto a serving plate.
Unlike many areas of the country, most urban homes in California have backyard fences. They are great for privacy and keeping the kids and pets in check. Most of the fences are wood, which fade and deteriorate over time. As such, I'm always on a mission to enhance the areas around the fence or gate in order to take away from looking at a plain wooden fence! I use trellises, birdhouses, decorative items, anything that directs the eye to the garden area and not the background fence.
We have two side gates on our property. One is tucked away on the right side of our house, a small brick sidewalk leading up to it. It is rarely used. I've been telling my Hubbers for a while now that I would like this gate to have a curve and to be painted red. He's very handy and eventually gets around to working on my projects, I just have to give him the clue (have I said before what a gem he is?). A few weeks ago, he called me out front to show that he had gotten out his jigsaw and curved the top of the gate! We went to Home Depot and bought paint and I did my part of the project. The gate now matches our front door and adds a little brightness to an otherwise dull part of the yard.
I added a wreath for a welcoming touch. I'm on the lookout for some large, bright colored, ceramic flower pots, preferably a yellow one, to plant with annuals and further brighten up the space. Of course, now that I'm looking, the inventory in the garden centers is severely lacking! I am patient and determined! (And I do have something planned for the empty space next to the pomegranate tree. Stay tuned!)
Now that I'm a dill farmer (with my one plant), I've been trying to incorporate fresh dill in more of our meals. Dill and salmon have long been associated with each other. We love salmon and we really loved this sauce. It was such an easy sauce to put together and really elevated a very simple dish.
We grill a lot and prefer our salmon grilled. The salmon can easily be baked in a 400-degree oven.
Salmon With Dill Sauce
4 6-oz. salmon fillets
1/3 cup plain, Greek yogurt
3 tablespoons mayonnaise
2 tablespoons sour cream
2 tablespoon olive oil
2 tablespoons freshly squeezed lemon juice, divided
1 tablespoon fresh dill, finely chopped; plus extra for garnish
1-2 teaspoons lemon zest
1 clove garlic
Sea salt and lemon pepper seasoning
Preheat grill (or oven, if using).
In a medium bowl, combine yogurt, mayonnaise and sour cream, and mix together.Then add dill, garlic, lemon zest and 1 tablespoon of lemon juice. Taste and add salt or pepper, if needed.
Season both sides of salmon with salt and lemon pepper seasoning. Drizzle both sides with olive oil and the remaining 1 tablespoon lemon juice. Grill for 13-16 minutes, or until cooked through.
Remove salmon from grill and let rest 5 minutes.Transfer to plates and serve, topped with dill sauce and fresh dill.
I have quite a few herbs growing in my backyard planters; herbs such as rosemary, thyme, oregano, mint, and basil. For the first time I also planted dill. Not only does dill have many culinary uses but the plant is also a favorite of butterflies. I enjoy having plants that attract butterflies, bees and birds! So with dill you get two benefits in one plant! What a deal for your gardening efforts!
My Grandma used to make bread and butter pickles and I would help her. I don't remember her making dill pickles but I'm sure she must have, she canned just about everything. A crop of dill growing just leads to thinking about dill pickles so I found an easy recipe and proceeded to make a batch. This recipe calls for refrigeration of the pickles to process them. As no water bath canning is involved it is very easy, and not time-intensive, to make a batch of these. They will keep well for several months, as long as they are kept refrigerated.
These pickles are very crisp, with a nice dill flavor, not too tart. I bought pickling cucumbers at the farmers market but am growing some at home which will go in the next batch. These are a quick and easy-to-make food gift for family and friends!
Refrigerator Dill Pickles
2 quarts water
1 cup white vinegar
1/3 cup pickling salt
3 to 4 pounds pickling cucumbers, washed and sliced into spears or chunks
8-10 large heads of dill
8 medium garlic cloves, peeled and sliced
1 tablespoon mustard seed
4 pinches red pepper flakes
20 black peppercorns
This yield 4 quarts of pickles. Canning jars aren't necessary but they do need a lid. Wash in hot soapy water, rinse well, and keep warm until ready to use to avoid cracking when the hot liquid is added.
Add the water, vinegar and salt in a saucepan over high heat. Bring mixture to a full boil and make sure the salt is fully dissolved.
In the bottom of each jar, place 1 large head of dill and 1 garlic clove.
Fill each jar with tightly with cucumbers, leaving an inch of headspace on top.
Top the cucumbers with another clove of garlic, another head of dill. Add a teaspoon of mustard seed, a pinch of red pepper flake and 5 peppercorns to each jar.
Carefully fill each jar with the boiling water/vinegar salt mixture, making sure to get the cucumbers completely covered. (It is very important that your jars are hot so that the hot mixture won't crack the jar. You can safely assume that I know this for a reason!)
Screw on the lids. Leave the jars out on the counter for 2 days, then store in the refrigerator at least two weeks before opening them.