Sunday, December 30, 2018

Stollen with Rosa

In the early 80's my husband made the acquaintance of a German woman, Rosa, who lived in his apartment complex.  Rosa was a WWII bride, coming to America in her early 20's. (Oh, the stories she tells of war time, especially of her father who went away to serve and was one of the missing, never to return home). She soon found herself with a husband who was abusive and 5 young children to raise. After 25 years she left the husband and was on her own, with little job-ready skills.  But a hard worker she was, as well as a wonderful seamstress.  She sewed and did alternations for people and house cleaning. In 1990, with a full-time job and two children under the age of 5, keeping my house in the shape I wanted it to be was becoming a problem.  We hired Rosa as our housekeeper.  She worked for us for almost 20 years and, during that time, became family to us. She would show up early on the days she had set aside for us, just so we could visit. She has attended our family birthday parties, weddings, and shared in so many of our family's up and downs.  We all have a soft spot in our hearts for her.


Rosa will be 84 in February, not as spry as she once was, but still a busy and industrious woman.  She lives about 20 miles away so we don't see her as frequently as we once did.  I always make a point to see her sometime during the holidays.  She usually makes us something to nibble on, we drink tea or coffee and catch up.  For years she has made me a loaf of German stollen bread, a slightly sweet bread filled with candied fruits, nuts and lemon zest.  This year she asked when I could come by for lunch and to get my stollen.  I replied that I wanted her to show me how she makes it instead.  We set up a time and we recently got together for our lunch and my baking lesson. It was a fun day.  I came home with a loaf of still-warm stollen (I couldn't resist and ate some in the car as I drove down the freeway!) and the recipe. Most importantly, I came home with memories of a day spent with a sweet woman.


Except for the fruit added, the stollen dough is actually quite low in sugar.  The finished bread is sprinkled with confectioners' sugar or drizzled with a glaze.  Rosa is not a fan of real sweet things so she usually just slathers the bread in butter as soon as it comes out of the oven.


Citron, a dried lemon, is not easy to find here and is pricey so we didn't put that in the stollen this time.  Instead we added more lemon zest to the dough. Orange zest can be substituted for the lemon. It's a versatile dough, you can add or subtract the sweet ingredients that are available. This recipe calls for the dough to be refrigerated overnight. Rosa no longer does that, she completes the stollen in one baking session.  Either way works!  Stollen is most commonly considered a Christmas bread, similar to panettone.  I like it any time of year.  It makes a big loaf; I usually cut mine in sections and place in freezer bags.  During tax season, as now, a slice or two of stollen with my morning coffee is a nice treat!


Stollen

1 package active dry yeast
3/4 cup warm water (105 to 115 degrees)
1/2 cup sugar
1/2 teaspoon salt
3 whole eggs
1 egg yolk (reserve white)
1/2 cup butter, room temperature
3 1/2 cups flour
1/2 cup chopped blanched almonds
1/4 cup cut-up citron
1/4 cup cut-up candied cherries, if desired
1/4 cup raisins
1 tablespoon grated lemon rind

In mixer bowl, dissolve yeast in the warm water.  Add sugar, salt, eggs, egg yolk, butter and half of the flour.  Beat 10 minutes on medium speed or by hand. Scrape sides and bottom of bowl frequently. With a spoon blend in remaining flour, nuts, fruits and rind. Scrape batter from sides of bowl. Cover with a cloth and let rise in a warm place until double in bulk, about 1 1/2 hours.  Stir down batter by beating 25 strokes. Cover tightly and store in refrigerator overnight.

Turn dough onto well-floured surface; turn to coat with flour.  Press into an oval, about 12/8".  Spread with soft butter.  Fold in two the long way.  Press only folded edge firmly. Place on greased baking sheet.  Brush with mixture of 1 slightly beaten egg white and 1 tablespoon water.  Let rise until double, 45 to 60 minutes. 

Preheat oven to 375 degrees.  Bake 30 to 35 minutes, or until golden brown. Frost while warm with the white icing or dust top of stollen with confectioners sugar.

White Icing:
Mix 1 1/2 cups sifted confectioners sugar and 1 1/2 tablespoon milk with a fork or whisk, until smooth. Decorate, as desired, with pieces of citron and candied cherry halves.

Sunday, December 2, 2018

2018 - Tea at the Christmas Tree Farm!

The girls in my family recently met for our 12th annual Christmas tea in my home. This year we only had 8 in attendance. In prior years we had attendance as high as 18.  Family issues, illnesses, and busy sports schedules meant I originally had RSVP's for 14, but it kept dwindling down, even on the day of the tea. This was disappointing to me as I spend a lot of time and money trying to make a memorable tea for everyone.  I'm not sure I will have the enthusiasm to tackle this next year, only time will tell.


Those of us in attendance had a nice time. The youngest to attend was my 7-month old great-nephew.  He was so good, just smiled and played the entire time. The oldest was my 80 year old mom.  Mom has dementia and it's becoming increasingly hard for her to do even the most basic tasks. She has always loved our tea parties and she had a wonderful time. Next up was my 79 year old aunt.  She, too, has health issues but was a trooper and carried on. The main purpose of our annual tea is to keep the generations together.  My 8 year old granddaughter was able to spend time with her older relatives as well as the baby. Family is everything, right?

Red farm trucks and black and white buffalo plaid is very "in" right now.  I chose my theme a year ago and started picking up items during the after-Christmas sales last year.  Originally I had planned to do a gingerbread farm scene for the large table but I came to my senses about a month ago!


The format of our teas is very traditional.  I make scones, lemon curd & strawberry jam for our first course and serve them to the guests.  Everyone brings a savory or sweet, some bring both (thank you!) We set these items on my kitchen island and serve them potluck style. My family can cook and bake, we always have plenty of good tasting items to choose from!  We share the leftovers, too!

My granddaughter always spends Friday nights with me so she helps me set the tables and decorate, as well as assist with the baking.  Earlier in the day I made Rice Krispies treats.  We cut them in rectangles and, using melted chocolate, M&M's and candy eyes, she turned them into reindeer.  It is fun to watch her confidence in her baking skills grow.


Here is a summary of prior teas:

2017 - Peppermint and Roses Tea

2016 - A Woodland Tea

2016 - A Valentine's Tea

2015 - Let It Snow Tea Party

2013 - A Gingerbread Tea


Monday, November 12, 2018

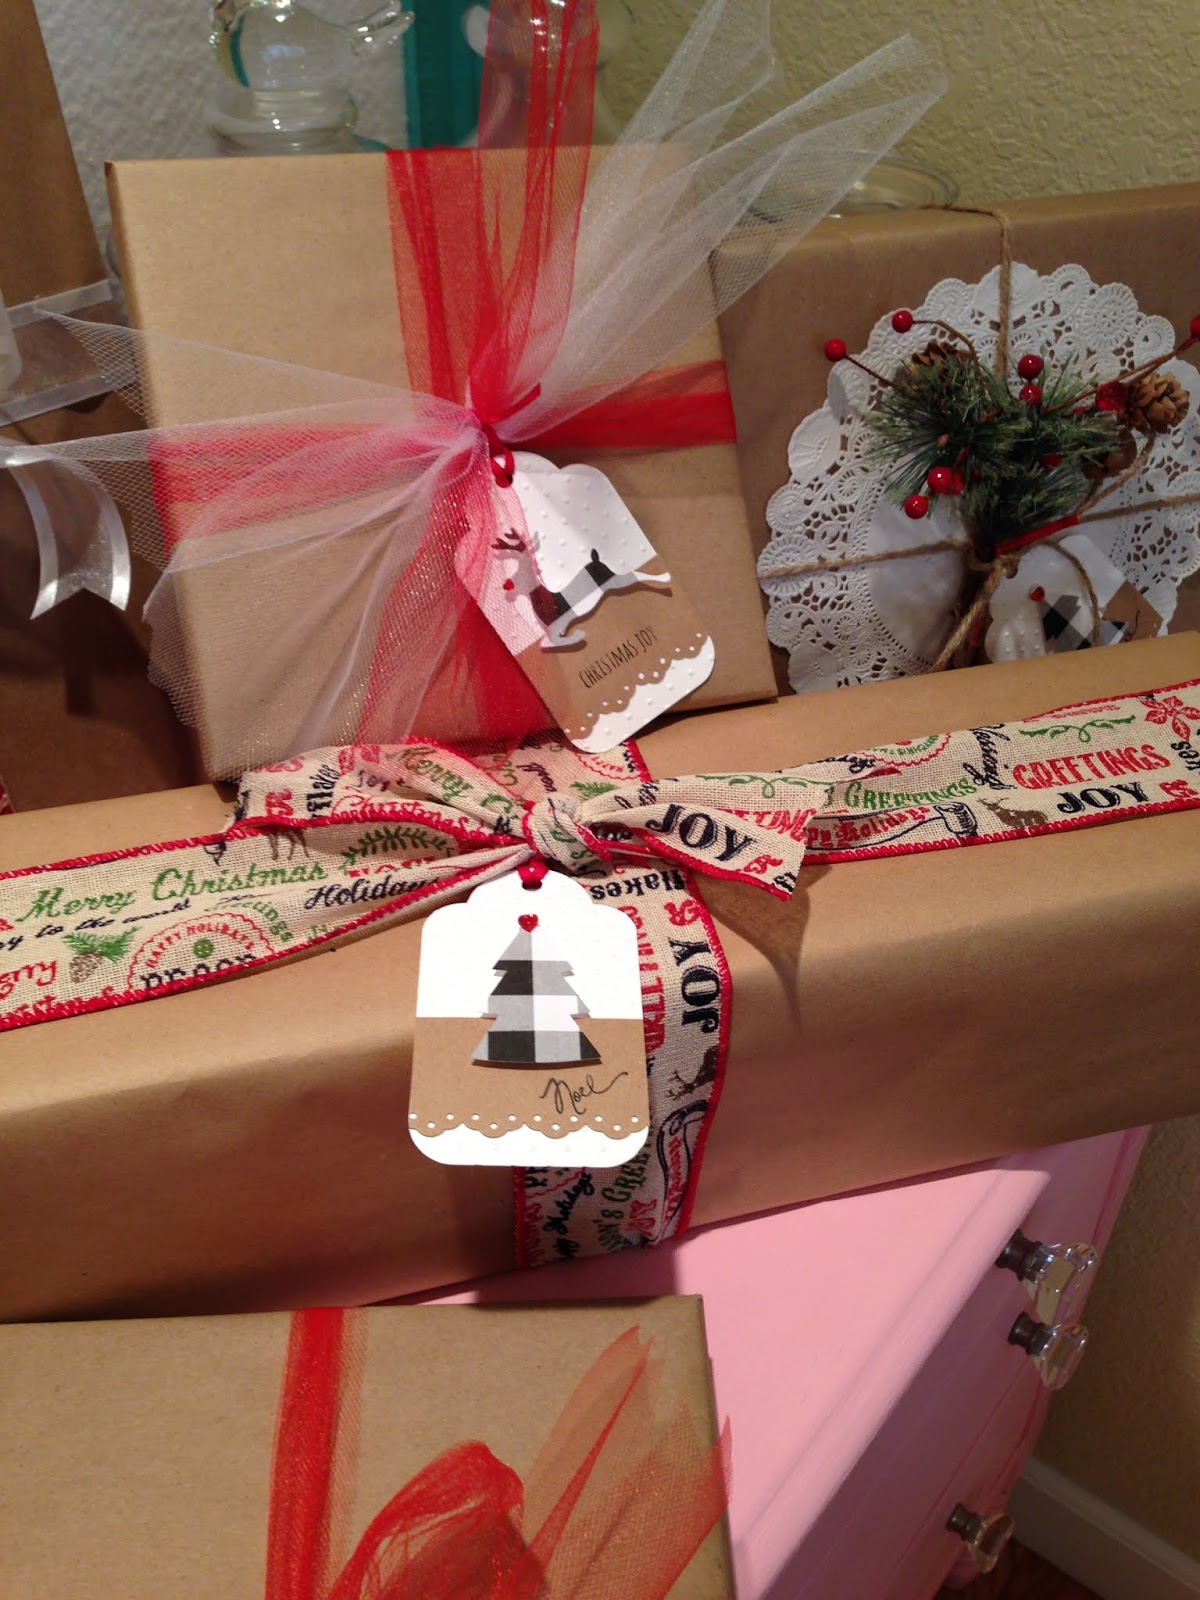
Christmas 2018 Gift Tags

I'm one of those that likes to enjoy each holiday as it comes, thus, I have not begun Christmas decorating.  I'm waiting to eat my turkey first! I'm getting antsy though, my daily browsing of Instagram feeds is so inspiring! Our tree will go up the day after Thanksgiving. However, that doesn't mean I'm not getting prepared for Christmas. I dislike shopping, especially when the stores are crowded, people are cranky, and I'm under a deadline.  I finished my Christmas shopping mid-October. This past weekend I began to get them wrapped.


Each year I make gift tags for our Christmas presents.  Once I've decided on a design or theme it's really mindless work cutting out the tags, stamping, embossing, and adding other decorations.  I usually do this while football is on in the background.  I love watching football and at least this way I'm being productive instead of just sitting on the couch!


A number of years ago a friend shared her gift wrapping trick with me, she only uses one paper each year. For about 20 years now I have been doing the same.  It makes wrapping so much easier.  I do like to get creative with the package decorating, though, using different types and colors of ribbons and embellishments.  This year we have a definite farmhouse/rustic theme with the wrapping.


I'm about 75% done with the wrapping.  As always, the hard part for me is finding boxes to fit the gifts! It is nice to have this chore off my to-do list, it gives me more time to really enjoy the holiday season, do more baking and spend time with family and friends.

Monday, November 5, 2018

Cranberry-Walnut Rolls

Prior to the advent of  the Internet with blogs, Pinterest, Instagram, even Facebook, I subscribed to many cooking magazines or bought cookbooks for new recipe inspiration.  I would cut out recipes and articles that interested me and save them in folders, by category, such as main dishes, desserts, etc.   Now it seems I "save" most of my recipes to my various Pinterest folders.  A month or so ago, I grabbed out my old-fashioned paper folders and was browsing through them.  I ran across this roll recipe from Bon Appetit magazine from November 2009.  I'm not sure why it has taken me nine years to make them as they are amazing!  They are the perfect roll for fall and Thanksgiving cooking.


These rolls were easy to make.  Like all yeast breads, time is the major factor in making them. My bread baking is usually confined to Sundays, that seems to be the calmest day of the week for me! While the dough is rising I can do chores, craft, and watch football.

The original recipe calls for brushing the unbaked rolls with an egg wash and raw sugar.  I had no raw sugar in the house.  After making them I don't think I will add the sugar the next time. They were wonderful, as is!


Cranberry-Walnut Rolls

1 cup coarsely chopped walnuts
3 1/2 cups (or more) bread flour
1 tablespoon (packed) brown sugar
1 1/2 teaspoons quick-rising dry yeast
1 1/2 teaspoons salt
1 1/2 cups whole milk
2 tablespoons vegetable oil plus additional for coating the bowl
1 large egg
1 cup sweetened dried cranberries
Nonstick vegetable oil spray
1 large egg, beaten to blend (for glaze)
Raw sugar (turbinado or demerara)

Stir nuts in dry skillet over medium heat until toasted, about 5 minutes. Cool.

Mix 3 1/2 cups bread flour, brown sugar, yeast and salt in the bowl of a heavy-duty stand mixer fitted with the paddle attachment. Warm the milk in a small saucepan over low heat until instant-read thermometer inserted in milk registers 95 degrees Farenheit. Add oil; remove from heat. Add the milk mixture and the egg to the flour mixture. Mix on low speed until a wet coarse ball forms, about 1 minute. Add nuts and cranberries. Replace paddle attachment on mixer with the dough hook.  Mix dough on low speed until smooth, elastic, and slightly tacky, adding more flour by tablespoonfuls if needed, about 4 minutes. Transfer dough to a lightly floured surface and knead two minutes

Lightly oil a large bowl. Shape dough into ball; place in prepared bowl, turning to coat with oil.  Cover with plastic wrap; let dough rise at room temperature until almost doubled in volume, 1 3/4 to 2 hours.

Line a large rimmed baking sheet with parchment paper. Transfer dough to an unfloured surface; divide into 12 equal pieces. Using cupped hand, roll and rotate 1 dough piece into a smooth round ball. Repeat with remaining dough pieces.

Transfer rolls to prepared baking sheet, spacing apart. Spray rolls with nonstick spray.  Cover loosely with plastic wrap; let rise at room temperature until 1 1/2 times original size, about 1 1/2 hours. Brush rolls with egg glaze; sprinkle with raw sugar. Let rise 15 minutes longer.

Meanwhile, position rack in center of oven and preheat to 425 degrees.

Place rolls in oven; reduce oven temperature to 400 degrees and bake 7 minutes. Rotate baking sheet; bake rolls until golden and slightly firm to touch, about 8 minutes longer. Cool completely on rack.

DO AHEAD: Wrap baked rolls in foil, then enclose in resealable freezer plastic bag and freeze for up to 2 weeks. Thaw rolls at room temperature. If desired, rewarm rolls wrapped in foil in 350 degree oven for about 10 minutes.

Tuesday, October 23, 2018

Paella on the Grill

Paella is a traditional rice dish of Spain.  It is a combination of saffron-flavored rice and various meats and/or shellfish.  Paella's name comes from paellera, the flat, round pan in which it is cooked.

After cooking paella, there is usually a layer of toasted rice at the bottom of the pan, called socarrat. To paella connoisseurs this is highly desired and is essential to a good paella. Even heat under the flat paella pan helps to achieve this. I have cooked paella on the stovetop.  It tasted great but I had to move the pan a lot to get even cooking underneath it and never got a real crispy socarrat. My solution to this was to cook a paella on our BBQ grill.  Traditionally, paella is cooked over open wood fires so this is a close substitute. It worked wonderfully!  I turned all the burners on the grill and the paella pan had even heat throughout. Next I need to try it in our wood-fired pizza oven. 

 
Paella is a one-pan dish.  It's not hard to make but does take some time to get all the liquid absorbed in the rice and to achieve the crunchy socarrat. We made this one Friday evening.  The weather was wonderful, we opened a bottle of wine and chatted while the paella was cooking. 

There are two key ingredients in paella.  The first is a short grain rice.  If you can find a paella rice (bomba), that is preferable.  My local stores didn't have any so I used an Arborio rice.  The second key ingredient is the spice saffron. A little saffron goes a long way, I only used 1/2 teaspoon in my paella.  I also soaked mine in the chicken broth so that the saffron flavor was more evenly distributed throughout the paella.

You can add or substitute other meats and shellfish such as chicken and clams to the dish.

This is a great dish to serve to a crowd, it makes a lot. Traditionally paella is served straight from the pan, it's placed in the middle of the table and everyone eats from the side closest to them. If you're not comfortable with that, serve it in a bowl!

Paella on the Grill

1 lb. shrimp, cleaned and deveined
1/2 lb. smoked Andouille sausage, sliced
1 1/2 cups short grain rice
1 white onion, finely chopped
4 small fresh tomatoes, chopped
5 cloves garlic, chopped
1/2 teaspoon saffron
1 teaspoon smoked paprika
5 1/2 cups chicken stock
1 cup of frozen peas, defrosted
1/4 cup olive oil

Heat your grill, for a gas grill have all burners on and leave on medium-high.

Put chicken broth in a saucepan, add the saffron.  Warm up on grill.

Put the paella pan on the grill and drizzle the bottom with the olive oil.

When the pan is hot, add the sliced smoked sausage and cook for a few minutes.  Add the onions and garlic, stir for a minute more, or until they are releasing their aroma.

Add the tomatoes and paprika.  Stir until combined then add the saffron-infused stock. Bring to a boil, then lower the flame so it simmers gently for 15 minutes.

Add the rice.  Stir everything in the pan thoroughly.  Once mixed thoroughly, do not stir again.  Arrange the shrimp on the mixture.  Continue to cook the rice over medium to low heat.  Add the green peas when very little liquid is left in the pan.

Increase the heat to high for a short time to create the crusty socarrat. Remove from the heat and let sit for 5 to 10 minutes.

It takes a bit of time for all the liquid to be absorbed.  Grab a glass of wine and relax!

Wednesday, October 17, 2018

Sweet Potato Dinner Rolls

Does anyone else get an increased urge to bake when the season changes from summer to fall? I sure do! I'm spending less time outdoors and more time in the kitchen these days. Sunday is my favorite day to bake.  My weekend chores are usually done by then, football and/or drag racing is on the TV, no grandchildren are spending the night (which wears Nana out!).  I have more time to devote to baking.  Often I turn to making something with yeast.  I love the whole bread-making process; the smell of yeast dough as it's rising, kneading and shaping the bread.  And, of course, there are few things in this world that can top the smell of bread baking in the oven!


These dinner rolls have a small amount of sweet potatoes in them.  The flavor is not overpowering, they aren't too sweet.  Potatoes have long been a great ingredient for a yeast dough.  They are made mostly of starch which turns into sugar.  Yeast loves sugar, it helps the dough rise and become moist and tender.

My son smoked spareribs the night I made these rolls.  Everyone devoured both! They would also be a great addition to the Thanksgiving table.

If you have a Kitchenaid mixer, the mixing and kneading can be done in the mixer bowl, just change to the dough hook for the kneading process. 

Sweet Potato Dinner Rolls

One .25 oz. package active dry yeast
1/2 cup warm water (110 degrees)
1 tablespoon white sugar
3 tablespoons brown sugar
1/2 cup mashed sweet potatoes
3 tablespoons butter, softened
1 teaspoon salt
2 eggs, slightly beaten
3 1/2 cups bread flour

Dissolve the yeast, warm water and white sugar in a large bowl. Let stand 5-7 minutes, or until yeast is bubbly and has risen up.

Add the brown sugar, sweet potatoes, butter, salt and eggs to the bowl.  Beat with an electric mixer on low until the ingredients are well mixed.

With the mixer still on low speed, add 3 cups of flour to the bowl, mix until flour is just incorporated.  Turn the dough out onto a clean lightly floured surface. Knead the dough and add enough of the remaining 1/2 cup flour to make a soft tacky dough.  Do not over knead the dough.

Place the dough in a large bowl coated with vegetable oil, turn the dough in the bowl so all sides are coated with oil. Place in a  warm, draft-free place to rise and cover the top of the bowl with a clean kitchen towel or plastic wrap. Let rise until double in size, about one hour.

Punch the dough down and let it rest for 2 minutes. Divide the dough into 12 pieces and roll into balls.  Place in a greased 13x9-inch baking pan.  Place in a warm draft-free place to rise covered with a clean kitchen towel or plastic wrap until double in size, about 45 minutes.

Bake in a preheated 375 degree oven for about 20 minutes, or until the roll tops are golden brown.

The yeast is nice and bubbly, which means it's alive and will make light fluffy rolls!

Small flecks of sweet potato in the dough.

I usually let my yeast dough rise on my cooktop, with the overhead light on.