Wednesday, January 29, 2014

Potholders

It's interesting how a simple item, gesture or need can turn into a family tradition. 
For as long as I can remember, Grandma McGee made potholders. She learned to make them from her mom. Grandma grew up in a poor, large family in rural Oklahoma. By necessity, nothing was wasted. They knew how to recycle and repurpose long before it was popular to do so! She raised her own family through the depression so frugality was a mandatory way of life for her and she never lost that trait.  Scraps of material became quilts and potholders, worn out blankets or towels became the potholder middles. For birthdays, Christmas, "just because", she would gift you with a pile of her homemade potholders. And they were great potholders, easily up to the tasks in a busy kitchen!
A number of years ago Mom started thinking about how we all relied on Grandma to keep us supplied in potholders and how Grandma wasn't always going to be here (Grandma has been gone 16 years now). So she learned how to make them and soon had taken over the family tradition of supplying everyone she knew with potholders!

I mentioned to her a few weeks back that I was running low (hint, hint Mom!)  Next thing I know she has dozens of them piled up in her sewing room in various stages of construction. She's passed them out to family, neighbors, Dad's bowling buddies and probably others I don't even know! When you give my Mom a hint she definitely catches on!
Mom's work-in-progress.
She had 6-8 potholders that were Grandma's, that were in her home when she passed. They are gently used and priceless to us.  I took one and plan on framing it along with a handwritten recipe of hers to display in my kitchen.  My sister took a few, also. Such simple mementos of a woman who was so precious to us.
Potholders from Grandma's kitchen.
Mom tells me I need to learn how to make these, to keep the tradition going. In fact she has written down her instructions for my use. She's shown my sister, too (my sister doesn't sew!) As our daughters love getting the potholders, too, I guess it's something I should get serious about. In the meantime Mom and her sewing machine are keeping the family tradition going!

Sunday, January 26, 2014

Pasta Making and Old Friends

Three of my high school girlfriends and I have been getting together for a girls' weekend for over 20 years now.  We've had back-to-back years and, when life has gotten in the way, we've gone 3-4 years between our trips. We've gone to the Monterey/Carmel area and San Francisco on many occasions. For the second time we recently went to a friend's house in Cayucos, which is located between Cambria and Morro Bay along California's scenic Highway 1.

We all had a desire this trip to stay close to the house, none of us were really interested in doing much shopping or sightseeing.  We wanted to relax and reconnect. We packed more pajamas than any other type of clothing, this was to be a comfy weekend! We watched movies, read, browsed cookbooks and Pinterest, caught up on our lives, talked about the "old" days.  We found an "oldies" radio station (I find it quite depressing that my high school era music is now considered an oldie!) and sang and danced. Two even tried to recreate an old songleading routine. Wine can make you think you are still 18! We had a wonderful, relaxing weekend. We go back many years, two of the girls were in diapers together. Though our visits are few and far between, we pick right back up when we're together.  I love these women and am so blessed to call them friends.

I've been practicing my beginning pasta-making skills a lot lately.  On New Year's Eve I made fettucini. A few weeks ago I made a beef-spinach ravioli.
When the girls and I were discussing what our meals would be they expressed an interest in learning how to make pasta.  I loaded my car down with my food processor, KitchenAid mixer, pasta attachment, and ravioli press.  Pasta Making 101 was about to take place! . My pasta-making skills are improving each time I do it and I was able to show the girls the process.  I'm confident that pasta will soon be produced in their own kitchens.  We had a very efficient assembly line going.  One worked on the filling, I made the pasta dough and rolled it out, the others filled up the ravioli tray and we all tinkered with the sauce. 
It was during this time that the music was blaring and the wine flowing so we did have to stop for some dancing and singing when a favorite song came on.  We had a blast!  And, oh my goodness, the ravioli were amazing!

Shrimp Ravioli with Sun-Dried Tomato Sauce

1 recipe of fresh pasta ( I rolled to setting 4)

Shrimp Filling:

8 ounces shrimp
8 ounces ricotta
1 egg
2 tablespoons grated Parmesan
2 tablespoons minced parsley

In a medium saucepan, simmer shrimp until they curl and turn pink, about 3 minutes.  Let cool and peel.

Transfer the cooked shrimp to a food processor fitted with the steel blade.  Pulse until minced.  Combine the shrimp with the ricotta, egg, parmesan and parsley.

Make ravioli according to the instructions with the ravioli press.  Or, place a rounded teaspoon of filling every 3 inches along the length of a pasta sheet.  Using a pastry brush or your fingers, wet the pasta along the edges and in between the rounds of filling. Lay a second pasta sheet over the filling.  Press around each ball of filling to seal the two layers of pasta together.  Use a pasta roller to cut between the filling to form squares of ravioli (or use a ravioli stamp).  Transfer the formed ravioli to a flour-dusted baking sheet until ready to cook.

Sun-Dried Tomato Sauce

4 tablespoons butter
3/4 cup sun-dried tomatoes, diced
1 cup dry white wine
1 cup heavy cream
1 cup Parmesan

Melt the butter in a pan over medium heat.  Add the sun-dried tomatoes and cook until the butter starts to bubble.  Add the white wine. Continue cooking, stirring occasionally for about 3 minutes.  Whisk in the heavy cream and cook, stirring constantly, until well combined, about 2 more minutes.  Add salt and pepper, to taste.  Stir in the Parmesan cheese and remove from the heat.

Cook 8-10 ravioli at a time in boiling, salted water, about 4 minutes per batch.  Using a slotted spoon, transfer cooked ravioli to a serving platter and top with sauce.

Note:  We had extra shrimp filling and added it to the sauce. I would definitely do that again!

I am linking up at A Stroll Thru Life's Inspire Me Tuesday!


Thursday, January 23, 2014

Football and Stitching! What Could Be Better?

Well, the Niners being in the Super Bowl would make it better but that's not meant to be this year! Darn!

I tend to get a lot of cross stitching done during football season.  I spend most of my Sundays, on the couch, watching football.  (And EVERY TV in the house is tuned in so I don't miss a thing as I'm cooking, doing laundry or other household chores!) Yes, I am serious about my football! I have a hard time being idle so I sew, it keeps my hands busy, therefore I'm busy and I have something to show for my hours on the couch (besides a softer behind!) I've been working on a hummingbird project since last spring, keep getting side-tracked with other crafting things.  At the beginning of football season I made major progress on it.  As the season got farther along and my Niners started marching towards the playoffs I found I couldn't work on this project.  It has a small black & white chart, lots of color shading and needle changes (44 different thread colors!), took a lot of concentration. I was making a lot of mistakes, having to re-do things so I did something I rarely do, I started another project.  Usually, I can only handle one project at a time!  But this project is super-easy and I've managed to get a lot done on it in the last few weeks.

One more game to go this year and then I'll get back to my more-complicated project. I've started on one of the hummingbirds and there is another to go. 
How will I spend my Sundays now?  At work. I think there are three seasons in my life...summer, football season and tax season! And tax season is here, time to buckle down and count the days until April 15!

Monday, January 20, 2014

Lemon Shrimp Orzo

Orzo pasta is a type of pasta which is made in the shape of a grain of rice. It is often about rice-sized, as well. This pasta is very versatile, and it can be used in a range of recipes, with many people consuming orzo in soups. I like to cook with it as it doesn't take as much time to cook as rice. It makes a great rice-substitute on those busy days.
I love using mason jars for pantry storage!
My busy days (and nights) are rapidly approaching.  I'm always on the lookout for a quick and healthy dinner.  I found this recipe on Pinterest (I have no clue where it came from so can't give the author proper credit). This made a great dinner.  From start to finish I had dinner on the table in 30 minutes.  It's a one-pot meal, too, so not much kitchen mess. I will definitely make this again.  The orzo alone would be great with baked chicken or a steak, the lemon gave it so much flavor.


                         LEMON SHRIMP ORZO

2 cups orzo
2 garlic cloves, minced
4 tablespoons butter
2 cups fresh spinach, chopped
3 1/2 cups vegetable or chicken stock (I used chicken)
Zest and juice from one lemon
1 pound large (21-30 count) shrimp, peeled and deveined
Kosher salt and freshly ground black pepper (or lemon pepper seasoning)

Preheat oven to 400.

In a large ovenproof skillet, melt butter over medium heat.  Add garlic and orzo; cook, stirring regularly, until garlic is fragrant and orzo starts to turn light brown.  Add stock, lemon juice and zest; cook until orzo is al dente and most of the liquid is absorbed, about 10 minutes (add water or additional stock, if necessary).

Season shrimp with salt and pepper (or with lemon pepper as I did).

Stir chopped spinach into orzo mixture, then top with the shrimp. Place skillet in oven on a middle rack and bake until shrimp are pink, about 7-9 minutes.  Avoid overcooking as shrimp will continue cooking for a couple of minutes when you pull the skillet from the oven.

Serves 4.

Saturday, January 18, 2014

Orange Cream Chiffon Cake

I seem to be on an orange kick lately. Oranges are about the only fresh fruit in the produce section of our supermarkets that are local and ripe. This weekend I will be baking some orange marmalade rolls. I made the Whole Orange Cake on Sunday.  And a few days ago I made this luscious chiffon cake for Stitch 'n Bitch (this is my last Stitch 'n Bitch until after tax season.  I will miss my Friday mornings with friends and my stitching project).

A chiffon cake is very similar to an angel food cake.  An angel food cake is made with only the egg whites and has no leavening in it.  A chiffon cake uses both the egg whites and yolks and usually has a leavening ingredient to it. A chiffon cake is still very light and airy just not as much as an angel food cake.  They are baked in the same tube-style pan. Both cakes are very easy to make, the only thing to be careful with is to make sure to  gently fold the egg whites into the flour mixture.  The egg whites are what gives the cake its light texture, beating the mixture will deflate the egg whites and leave you with a dense cake.
We devoured this cake! It's got a nice orange flavor to it, not overpowering.  The filling is not real heavy and does not overpower the lightness of the cake.

                    ORANGE CREAM CHIFFON CAKE

9 eggs, separated

1 cup sugar, divided

1/4 cup orange juice
4 teaspoons orange peel
1 cup plus 2 tablespoons all-purpose flour
1 teaspoon cream of tartar
1/2 teaspoon salt

FILLING:
1 cup sugar
¼ cup all-purpose flour
¼ teaspoon salt
½ cup orange juice
1 egg, lightly beaten
4 teaspoons grated orange peel
1 pint whipping cream, whipped

 Preheat oven to 325°.
Place egg white in a large bowl; let stand at room temperature for 30 minutes.  In another large bowl, beat egg yolks until slightly thickened.  Gradually add 1/3 cup sugar, beating until thick and lemon-colored. Blend in orange juice and peel.  Add flour and remaining 2/3 cup sugar to yolk mixture; mix well.

Add cream of tartar and salt to egg whites; beat with clean beaters until stiff peaks form.  Fold into  batter.  Gently spoon into an ungreased 10-inch tube pan.  Cut through batter with a knife to remove air pockets.
Bake at 325° on lowest oven rack 40-50 minutes or until top springs back when lightly touched.  Immediately invert pan (I use a bottle); cool completely, about 1 ½ hours.  Run a knife around sides and center tube of pan; remove cake.

For filling, in a double boiler or a metal bowl over simmering water, combine the sugar, flour and salt.  Add the orange juice, egg and orange peel.  Constantly whisk until mixture reaches 160° or is thick enough to coat the back of a spoon.  Remove from heat and cool completely.  Fold in whipped cream.

Cut cake horizontally into three layers.  Place bottom layer on a serving plate; top with one-third of the filling.  Repeat layers twice.  Serve immediately or refrigerate.


Wednesday, January 15, 2014

Whole Orange Cake

I like to cook and bake with in-season ingredients.  I'm fortunate enough to live in a prime agriculture area, where fresh produce can be found at farm stands and farmers' markets everywhere. Alas, not much grows in winter except for citrus fruits but there are many wonderful things to be made with citrus. 

A friend introduced me to this recipe.  It's from Sunset magazine and was one of their most-requested recipes for 2013. The recipe intrigued me and made me suspicious at the same time as the major ingredient is whole, pureed oranges. Yes, peel, pith and all.  I thought how could this not be bitter? I had to try it! Surprisingly, it's not bitter.  It's got lots of orange flavor and the small chunks of peel are tender after baking.  It's a moist, dense cake.  I think it's a good cake to serve for brunch or tea, more so than an after-dinner dessert. It was very easy to put together and the orange aroma in my kitchen, as it was baking, was intoxicating. My hubby & I each had a piece and the remainder went to our office.  Everyone loved it so I will definitely make this again.

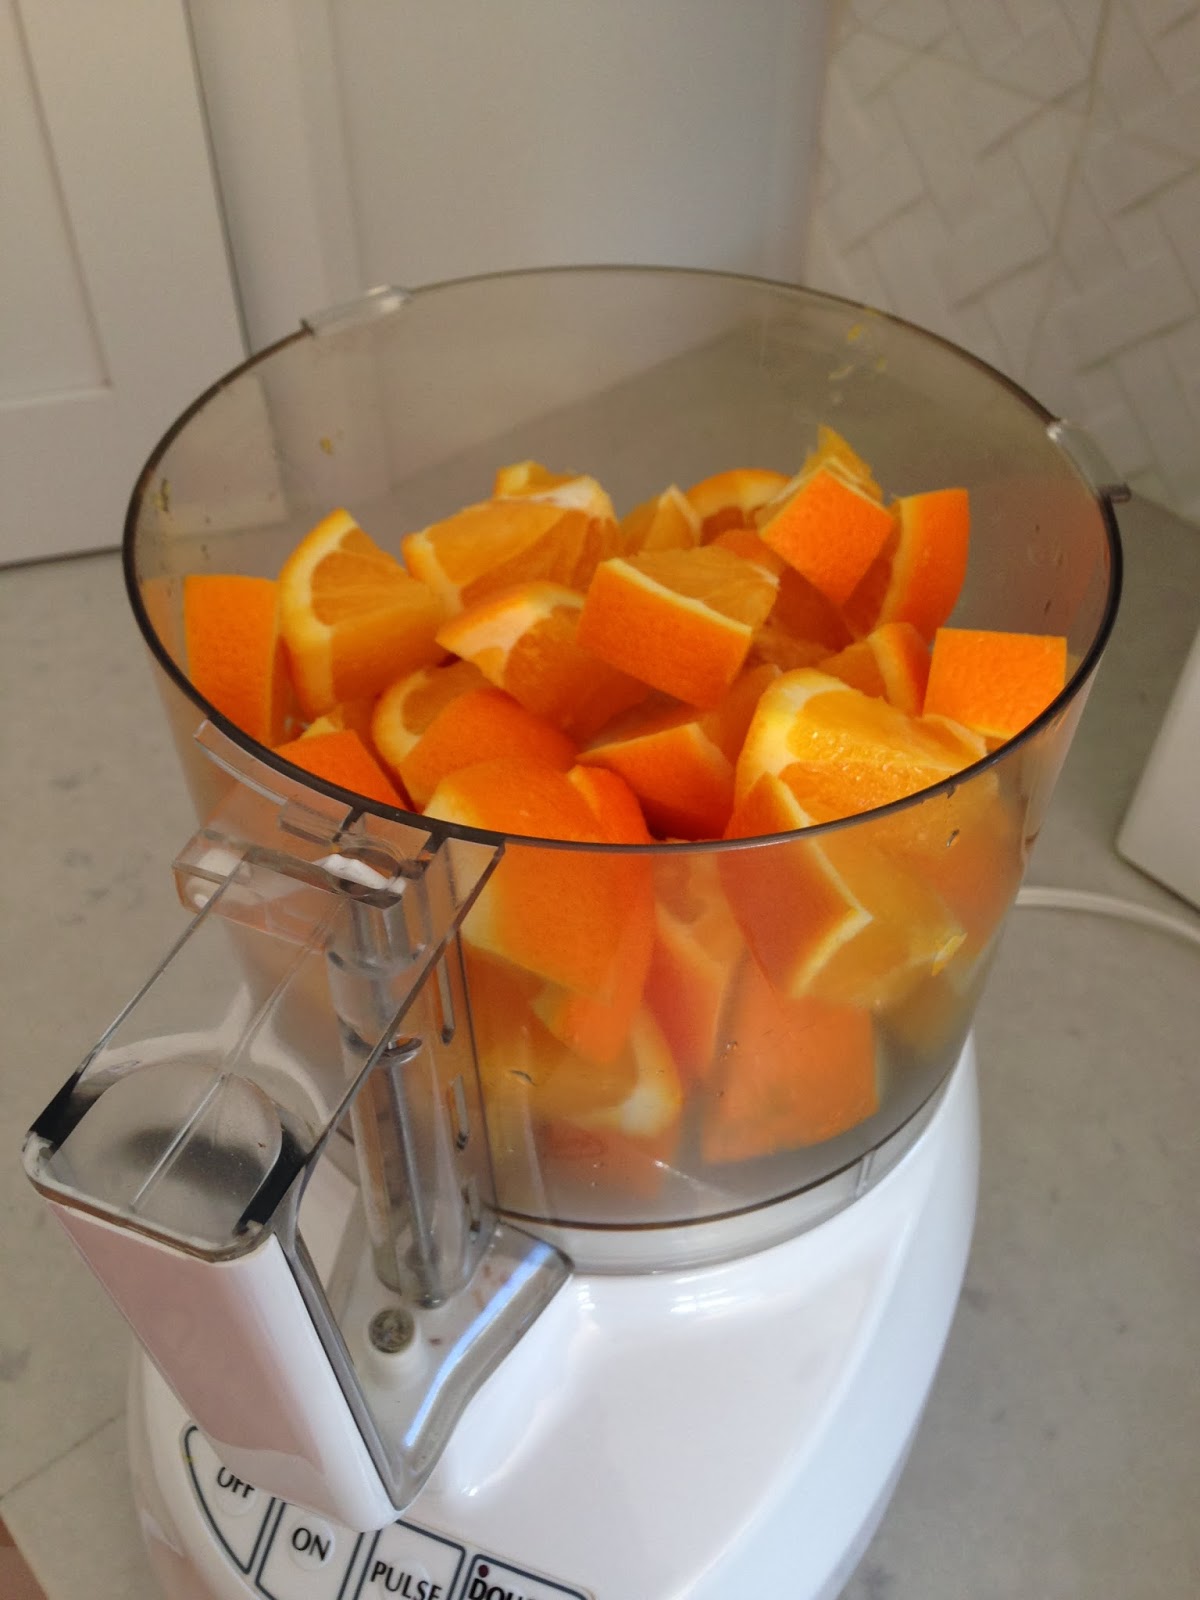
Throw the orange chunks in your food processor and whirl, until just small pieces of orange rind remain. 


                                                      WHOLE ORANGE CAKE

1 cup butter, softened

1 ¼ cups granulated sugar

3 large eggs

2 oranges (about 1 lb. total), ends trimmed, then cut into chunks and seeded

2 ½ cups flour

¼ teaspoon salt

¼ teaspoon baking soda

½ teaspoon baking powder

1 ½ cups powdered sugar

2 tablespoons plus 1 teaspoon orange juice

 Preheat oven to 325 °.  Coat a 10-cup Bundt pan with cooking-oil spray.  In a large bowl with a mixer on medium speed, beat butter and granulated sugar until fluffy.  Beat in eggs.

 Whirl orange chunks in a food processor until mostly smooth but not pureed.  Add 1 ½ cups orange mixture to batter and beat until blended.  Add flour, salt, baking soda, and baking powder to bowl and beat until smooth.  Spread batter in prepared pan.

 Bake until a toothpick inserted in the center comes out with only a few crumbs clinging to it, about 55 minutes.  Cool pan on a rack 10 minutes, then invert cake onto rack and let cool completely.

 Whisk together powdered sugar and orange juice in a small bowl (adding more juice, as needed).  Drizzle over cooled cake.  Let glaze set, then slice cake.


Saturday, January 11, 2014

The "Old" Pink Coat

If you know me, or have been following this blog, you know I love and treasure hand-me-downs, especially if they come from family or close friends. Most of my vintage items aren't worth much monetarily, but they are priceless to me (cue the Visa commercial!) I display them in both the traditional ways, such as on a shelf or cabinet, and in non-traditional ways. I believe old treasures should be used and appreciated, not kept in a box and saved for a "special occasion".

One of my most sentimental items is a pink corduroy baby's coat and hat.  I wore it as a baby.  I'm sure my sister wore it, too, as we were not an affluent family and my hand-me-downs became hers.  Unfortunately, as the third child, pictures of her aren't as plentiful as mine and I've yet to find a picture of her wearing this coat. This picture of my Mom and I was taken in Klamath Falls, Oregon (where my Dad was raised) in 1957.
Fast forward to 1985 and I now have a daughter of my own. Mom retrieved the coat from its storage spot and my daughter wore it on more than one occasion.
After she outgrew it, I packed it away. I presented it to her at her baby shower in 2010.
And, later that year, a third generation of babies wore that coat and hat!
Once more it has been packed away.  I hope I am around to see another little girl wearing it someday! In another 20 years or so I'll only be in my mid-70's!

In making this post, one thing I've noticed is we all have the same fat cheeks! There is no denying the mother-daughter-granddaughter relationship!


Tuesday, January 7, 2014

Friday, January 3, 2014

This is Winter?

On a day when the northeast part of our country is socked in with rain, snow and frigid temps, we are enjoying almost spring-like conditions in the central California valley.  Except for about a week of freezing nights, we have had a very mild winter.  Alas, we've had no rain which is not a good thing. This is farm country and we need the rain and snow to fill up the reservoirs and provide irrigation water this summer.  We'll soon be doing rain dances out here if we don't get rain soon!

On this mid-60 degree day I got a lot of yard work done.  I weeded, pruned, pulled out dead perennials, refilled the hummingbird feeders (I have birds all year long) and worked up a sweat! I will go into my busy tax season schedule with my yard in pretty good condition, which means less catch-up after April 15! California has its share of problems but you can't beat the weather!

Only 169 days until summer!


Wednesday, January 1, 2014

New Year's Eve Dinner For Two

My hubby and I haven't gone out on New Year's Eve since our son was 2 months old, which was 31 years ago! We have hosted a few New Year's Eve dinners but prefer to spend the evening with just the two of us.  We never see midnight, unless someone calls or nearby fireworks wake us up. Party poopers we may be!

This year I set us a table in front of the fireplace using silver, white and purple in the chargers, plates, napkins, candles, flowers and confetti. Just because we're eating in doesn't mean it can't be a nice experience.  It wasn't all fancy, though, as we were dressed in our flannel pj's. That might have taken the romanticism down a notch or two! But, that's one of the advantages of staying home, not having to get dressed up!


Our dinner started out with a simple iceberg lettuce wedge salad.  My hubby loves this type of salad.  I jazzed it up a little bit with some chopped tomatoes, boiled egg and crumbled bacon.
Our main dish was luscious and one I will make again, Lobster Pasta with Herbed Cream Sauce (recipe here). The original recipe called for live lobsters.  I have two problems with that. One, they are hard to come by in central California and, two, I don't have the heart to put a live lobster in a pot of boiling water.  Sorry, just cannot do that! Instead, I bought 3 lobster tails and steamed them before proceeding with the rest of the recipe.  This dish was so good, I can't imagine that using whole, live lobsters would make it any better.
Part of this recipe involves infusing the warm cream with herbs and the lobster shells, then straining.  The sauce is almost like a lobster bisque. Later, the pieces of pre-cooked lobster are added back to the sauce and mixed with the pasta.
 
We love fresh, homemade pasta but the process has always intimidated me. Why, I don't know, as it's really not that difficult.  Over the last few years I've made pasta more frequently and each time it gets easier and less intimidating.  I had no problems making the fettuccine.  In fact, it was going so easy that we were talking about what pasta we would make next (ravioli, in case you're interested!) I have a pasta attachment for my KitchenAid mixer which makes the process even easier.
The only problem with eating at home is there are no busboys or dishwashers to clean up the mess! So we took a break to do some dishes, clean the kitchen and let our meal digest before having dessert. It was worth the wait. I made Panna Cotta which, in Italian, means cooked cream (recipe here) and topped it with mixed berries.  It was light and airy, just enough of a sweet so that we knew we had dessert but didn't leave us feeling stuffed.
As a sign that this is a "real" event you can see that I failed to notice the charger had pasta spilled on it.  Oops! So, I won't be winning any photo awards!
It was nice to have a quiet evening at home.  We are both CPA's and about to get slammed with tax season.  Quiet dinners won't be happening again until after April 15.  Some nights we'll be lucky to even have dinner! So, we toasted to the new year knowing the next few months will be crazy but knowing we will make it to the end, we always do!

 
 I am linking up to Tablescape Thursday!