There are many tutorials for making these tissue flowers. This is the one I used.
Showing posts with label Crafts. Show all posts
Thursday, May 11, 2017
Tissue Paper Hydrangea
Many parts of my life I keep very simple. One of those areas is gift wrapping. I don't like storing a bunch of different paper and bags or running to the store at the last minute when I have a gift to wrap and nothing to wrap it with. Consequently, I have developed a system that works for me. I stock up on brown kraft bags of various sizes and brown kraft wrapping paper. With the exception of Christmas (where I use the same paper throughout the season), virtually all of my gifts are wrapped in craft paper. It is so versatile and can be used for any occasion, especially when embellished with a little ribbon and decorated. That's the fun part for me, decorating the package. (I know, you're thinking that her gift wrap system is simple but she complicates it with decorating!)
While browsing Pinterest (gosh, I love that site!) I found a tutorial to make hydrangea flowers from tissue paper. As I have a wedding to attend and it's spring, I thought this would make an ideal decoration for the wedding gift. It was so easy to make, very reminiscent of making tissue paper pom poms. I'm quite happy with the results! Sometimes a girl just has to create and these flowers were quick and easy to do!
There are many tutorials for making these tissue flowers. This is the one I used.
Monday, January 2, 2017
Fabric Decoupage Plates
By now, you know that I love to play with dishes; to mix and match dishes, napkins, and silverware to create fun table settings. I enjoy setting a pretty table for my guests and it's a nice creative outlet to put things together.
Sometimes I get an idea for a table setting but can't find all the pieces to make it work. Such was the case for New Year's. I wanted to do a table setting using clock plates. A few years ago Pottery Barn had some clock plates. I didn't buy them at the time, they are now discontinued, and I'm not paying E-Bay prices for them. I remembered that one of my local fabric stores had a display for plates that they made with fabric and Mod Podge, which is a decoupage medium. So I made a trip to the store, bought a few clear glass plates and some fabric. I grabbed their instruction sheet, as well as turned to the internet for guidance. They were very easy to make and I love how they turned out!
I always have Mod Podge on hand, the one I used was for a matte finish. They make one for outdoor use, which probably holds up to water better, but my store didn't have any in stock. As the Mod Podge is on the back of the plates, you are able to eat off the plates. To clean, hand wash them gently and avoid soaking them in water, then lay them upside down to dry.
Now that I've done my first few plates, I have many ideas for future plates and chargers. It's a great way to have special occasion dishes at a very low cost. Glass plates can be found quite inexpensively at most hobby and dollar stores.
Step 1: Cut out a fabric circle large enough to cover the plate, about 1" wider than the plate all the way around. You can lay the plate upside down on the fabric and draw a circle around it. I stacked two plates together and cut.
Step 2: Make sure the back of the plate is very clean. Lay it upside down on an old towel or waxed paper. Using a sponge brush, paint a good even coat of Mod Podge all over the back of the plate.
Step 3: Place a fabric circle, right side down, on top of the plate and gently smooth it out to cover the plate and remove any creases. You can use a credit card like a squeegee to remove any air bubbles and to make sure everything is stuck tight to the glass.
Step 4: Paint a light, even coat of Mod Podge over the entire back surface of the plate and allow to dry. I set them on top of a bowl so they wouldn't stick to my work towel.
Step 5: Using very sharp scissors, cut away the excess fabric around the edge of the plates as close to the edge as possible (you could probably trim it with an Exacto knife, too). Paint another coat of Mod Podge onto the back of the plate. Wait at least 48 hours before using the plates to allow the Mod Podge to set up completely.
Sometimes I get an idea for a table setting but can't find all the pieces to make it work. Such was the case for New Year's. I wanted to do a table setting using clock plates. A few years ago Pottery Barn had some clock plates. I didn't buy them at the time, they are now discontinued, and I'm not paying E-Bay prices for them. I remembered that one of my local fabric stores had a display for plates that they made with fabric and Mod Podge, which is a decoupage medium. So I made a trip to the store, bought a few clear glass plates and some fabric. I grabbed their instruction sheet, as well as turned to the internet for guidance. They were very easy to make and I love how they turned out!
I always have Mod Podge on hand, the one I used was for a matte finish. They make one for outdoor use, which probably holds up to water better, but my store didn't have any in stock. As the Mod Podge is on the back of the plates, you are able to eat off the plates. To clean, hand wash them gently and avoid soaking them in water, then lay them upside down to dry.
Now that I've done my first few plates, I have many ideas for future plates and chargers. It's a great way to have special occasion dishes at a very low cost. Glass plates can be found quite inexpensively at most hobby and dollar stores.
Step 1: Cut out a fabric circle large enough to cover the plate, about 1" wider than the plate all the way around. You can lay the plate upside down on the fabric and draw a circle around it. I stacked two plates together and cut.
Step 2: Make sure the back of the plate is very clean. Lay it upside down on an old towel or waxed paper. Using a sponge brush, paint a good even coat of Mod Podge all over the back of the plate.
Step 3: Place a fabric circle, right side down, on top of the plate and gently smooth it out to cover the plate and remove any creases. You can use a credit card like a squeegee to remove any air bubbles and to make sure everything is stuck tight to the glass.
Step 4: Paint a light, even coat of Mod Podge over the entire back surface of the plate and allow to dry. I set them on top of a bowl so they wouldn't stick to my work towel.
Step 5: Using very sharp scissors, cut away the excess fabric around the edge of the plates as close to the edge as possible (you could probably trim it with an Exacto knife, too). Paint another coat of Mod Podge onto the back of the plate. Wait at least 48 hours before using the plates to allow the Mod Podge to set up completely.
Thursday, December 8, 2016
Christmas Tags 2016
I recently read an article where Neuroscientists believe that forms of creativity are beneficial to your health. Their reasoning is that while we are being creative our brains release dopamine, which is a natural anti-depressant. Creativity usually takes concentration and it can lead to the feeling of a natural high. Many scientists believe that there is a link between creative activities and the ability to reduce cognitive impairment associated with aging. Taking the time to activate creativity allows you time to de-stress and relax. Research shows that creative practices improve depression, anxiety and coping skills while significantly reducing stress, which are all vital for brain health and well-being. Crafting can give you a sense of pride and achievement and teach you patience and perseverance.
I am clearly no scientist but my experience is that crafting is very relaxing. My creative activities usually involve cross stitching, sewing (lately I've been learning to quilt), paper crafts and baking, but I am game to try anything. I am not one to sit in front of the TV with idle hands, they must be moving, so I usually stitch if watching a movie. A date with a cup of tea, my corner chair and my latest cross stitch project is very therapeutic to me. I have to concentrate on my stitches and the pattern and soon the stress of everyday life has been dissipated for a while. I tend to believe what the scientists are saying!
The last few years I've been playing with paper; making cards, banners and tags. I make a different Christmas tag each year. I know, they are not expensive to buy at Hobby Lobby but it's for my mental health, remember?!! This year my design inspiration was a Stampin Up! bird punch that I've had for a few years. I have bird feeders all over my backyard so it seemed rather fitting that I incorporate birds into my tags!
Paper projects are easily broken down into small steps so they can be done over a period of time. I started my tags on Election night, using a punch to cut out the bird and branch while I watched the election results. One night after work, and using my Silhouette die cutter machine, I produced a bunch of plain white tags in my chosen shape. While watching football on Sunday I stamped them with written images, ran them through a snowflake embossing folder, and glued the birds and branches on them. Each step was easy and didn't take much time. And I'm sure my dopamine production was at high capacity!
I am clearly no scientist but my experience is that crafting is very relaxing. My creative activities usually involve cross stitching, sewing (lately I've been learning to quilt), paper crafts and baking, but I am game to try anything. I am not one to sit in front of the TV with idle hands, they must be moving, so I usually stitch if watching a movie. A date with a cup of tea, my corner chair and my latest cross stitch project is very therapeutic to me. I have to concentrate on my stitches and the pattern and soon the stress of everyday life has been dissipated for a while. I tend to believe what the scientists are saying!
The last few years I've been playing with paper; making cards, banners and tags. I make a different Christmas tag each year. I know, they are not expensive to buy at Hobby Lobby but it's for my mental health, remember?!! This year my design inspiration was a Stampin Up! bird punch that I've had for a few years. I have bird feeders all over my backyard so it seemed rather fitting that I incorporate birds into my tags!
Paper projects are easily broken down into small steps so they can be done over a period of time. I started my tags on Election night, using a punch to cut out the bird and branch while I watched the election results. One night after work, and using my Silhouette die cutter machine, I produced a bunch of plain white tags in my chosen shape. While watching football on Sunday I stamped them with written images, ran them through a snowflake embossing folder, and glued the birds and branches on them. Each step was easy and didn't take much time. And I'm sure my dopamine production was at high capacity!
| I used my Silhouette machine to quickly cut out multiple tags. |
| Multi-tasking! |
| Stamping the sentiments and drinking a latte! |
| Embossing adds texture to the tags. |
| Now I need to finish the gift wrapping! |
Wednesday, October 28, 2015
No-Sew Burlap Table Runner
I had a monogrammed burlap table runner that I made a few years ago. Last year we spilled red wine on it (oops!) and I couldn't get the stain out. I wanted another burlap runner to complement my fall decorating, but didn't want to take the time to sew one. While watching football a few weeks back I whipped this one out. I like how it turned out; it's a little rustic but softened up a bit with the satin ribbon.
I've gotten frustrated in the past while working with burlap. It's a very loose-weave fabric and frays as it's being looked at, I think! It's hard to get a straight cut. The clerk at the fabric store enlightened me to a neat trick as she was cutting the fabric for me. She ripped out one of the threads, then used that as the cutting line. Well, how nifty is that?!!
To make this runner I measured how wide and long I wanted it to be. I identified the thread that was closest to the point of measurement. I followed that thread to the raw end of the fabric and tugged at the thread. I then gently pulled the thread, holding on to the fabric, so that the thread slid out of the burlap. That became my cutting line.
To make the space for the ribbon I marked where I wanted the ribbon to go and how wide the opening needed to be. I pulled out enough threads so that the ribbon would fit.
After that it was a matter of weaving the ribbon in and out of the fabric (I went every 5 threads). To make it easier to weave, I attached a safety pin to the end of the ribbon.
This is easily a no-sew project. As the burlap does fray so easily, I ran a quick zig-zag stitch about one-inch in to limit the amount of fray.
I've gotten frustrated in the past while working with burlap. It's a very loose-weave fabric and frays as it's being looked at, I think! It's hard to get a straight cut. The clerk at the fabric store enlightened me to a neat trick as she was cutting the fabric for me. She ripped out one of the threads, then used that as the cutting line. Well, how nifty is that?!!
To make this runner I measured how wide and long I wanted it to be. I identified the thread that was closest to the point of measurement. I followed that thread to the raw end of the fabric and tugged at the thread. I then gently pulled the thread, holding on to the fabric, so that the thread slid out of the burlap. That became my cutting line.
To make the space for the ribbon I marked where I wanted the ribbon to go and how wide the opening needed to be. I pulled out enough threads so that the ribbon would fit.
After that it was a matter of weaving the ribbon in and out of the fabric (I went every 5 threads). To make it easier to weave, I attached a safety pin to the end of the ribbon.
This is easily a no-sew project. As the burlap does fray so easily, I ran a quick zig-zag stitch about one-inch in to limit the amount of fray.
| I found the most beautiful tulips at the flower mart! |
Tuesday, May 27, 2014
Procrastination 101
I'm normally a very organized person. I plan ahead, make to-do lists, have household routines and pretty much stay focused on what needs to be done (I even have a list of crafting projects I want to get done in 2014).
However, when it comes to some of my crafting projects I tend to procrastinate on getting them done. I think this procrastination can be explained by two things; intimidation or dislike for a certain procedure. If a certain procedure or technique in a project is something I've never done before or that looks too difficult I tend to put it off. And if the procedure is something I'm not real fond of doing, that gets put off, too! The end result is I end up with a few works-in-progress that take up space in my craft room and in my mind.
This past weekend I vowed to get through some of these projects. My Hubbers was away on a bike adventure so I had five whole days to myself. No more excuses that I had chores to do or places to go. It was time to get things accomplished! As is usually the case, once I got involved with things I found that it was easy to finish and I shake my head in disgust wondering why it took me so long to get to this point! I'm quite pleased with my progress as I have no more WIP's laying around my room! (I do, however, have plenty of unstarted projects!)
This cross stitch project has been moved around my craft room for 14 months now. All it needed were the beads on top of the firecrackers. Doing bead work is not my favorite thing to do though I love the effect bead work has on a stitched piece. Little needle, little beads, old eyes. It's a precarious combination. In about 30 minutes I had it done and it is now at the framing shop.
My youngest granddaughter will be four in September. These cross-stitched pieces will make up a birth sampler for her. It is done on perforated paper which threw me for a loop at first. All it needed to be finished was to stitch her name and birth date in the blanket and cut out all the paper-stitched pieces. I set up shop in my living room chair, turned the TV on to the day's drag racing coverage and got it done. It, too, is now with the framer. The pieces will hang from a string clothesline, with little clothespins. It's going to be adorable!
I started these strawberry pincushions before tax season overwhelmed me. They sat next to my sewing machine for three months, just needed the leaves to be glued on and the flowers cut, beaded and glued on. Took me no time to finish!
A year ago I bought some Annie Sloan chalk paint (Emperor Red) with plans of painting this living room table. I'm intimidated by the whole process even though I've read many tutorials and viewed many You Tube videos. My Hubbers will be going on another biking adventure in July. I'm bound and determined that when he returns home this table will be red! As the little engine said, "I think I can, I think I can!"
However, when it comes to some of my crafting projects I tend to procrastinate on getting them done. I think this procrastination can be explained by two things; intimidation or dislike for a certain procedure. If a certain procedure or technique in a project is something I've never done before or that looks too difficult I tend to put it off. And if the procedure is something I'm not real fond of doing, that gets put off, too! The end result is I end up with a few works-in-progress that take up space in my craft room and in my mind.
This past weekend I vowed to get through some of these projects. My Hubbers was away on a bike adventure so I had five whole days to myself. No more excuses that I had chores to do or places to go. It was time to get things accomplished! As is usually the case, once I got involved with things I found that it was easy to finish and I shake my head in disgust wondering why it took me so long to get to this point! I'm quite pleased with my progress as I have no more WIP's laying around my room! (I do, however, have plenty of unstarted projects!)
This cross stitch project has been moved around my craft room for 14 months now. All it needed were the beads on top of the firecrackers. Doing bead work is not my favorite thing to do though I love the effect bead work has on a stitched piece. Little needle, little beads, old eyes. It's a precarious combination. In about 30 minutes I had it done and it is now at the framing shop.
My youngest granddaughter will be four in September. These cross-stitched pieces will make up a birth sampler for her. It is done on perforated paper which threw me for a loop at first. All it needed to be finished was to stitch her name and birth date in the blanket and cut out all the paper-stitched pieces. I set up shop in my living room chair, turned the TV on to the day's drag racing coverage and got it done. It, too, is now with the framer. The pieces will hang from a string clothesline, with little clothespins. It's going to be adorable!
I started these strawberry pincushions before tax season overwhelmed me. They sat next to my sewing machine for three months, just needed the leaves to be glued on and the flowers cut, beaded and glued on. Took me no time to finish!
A year ago I bought some Annie Sloan chalk paint (Emperor Red) with plans of painting this living room table. I'm intimidated by the whole process even though I've read many tutorials and viewed many You Tube videos. My Hubbers will be going on another biking adventure in July. I'm bound and determined that when he returns home this table will be red! As the little engine said, "I think I can, I think I can!"
Please join me at a Stroll Thru Life's Inspire Me Tuesday!
Monday, June 24, 2013
Beach Week Crafting
My hubby and I recently rented a house in the beach community of Aptos. During the course of the week, our three children, daughter-in-law and three granddaughters were able to join us. Knowing we couldn't be on the beach 24/7 I packed a few crafting projects that we did in the mornings. It helped fill up our days and keep boredom at bay for an 8, 5 and almost 3 year old. Many of the craft ideas were Pinterest-inspired. Love that site!
Of course, we did the normal beach activities and made many a sand castle and moat!
We made handprint crab t-shirts. This involved an adult per child as painting red paint on little hands can be quite messy! To do this, paint one hand (quite heavily) with red paint. Place on t-shirt with thumb facing toward neck of the t-shirt. Wash hand and apply red paint to the other hand. Slightly overlapping the palm, repeat the step. Once they were dry I glued eyes and made a smile with a marker.
A few days later we wore them on our trip to the Monterey Bay Aquarium!
Another morning we made caterpillar refrigerator magnets. I bought a few packages of small pom poms, regular clothespins and pipe cleaners. The girls glued in various color combinations. When done we glued a magnet to the back of the clothespins. They each had enough to keep at their homes and some to give away to their other grandparents.
We painted rocks to look like ladybugs and bumblebees, making a tic-tac-toe set. The girls had fun painting them and later playing the game!
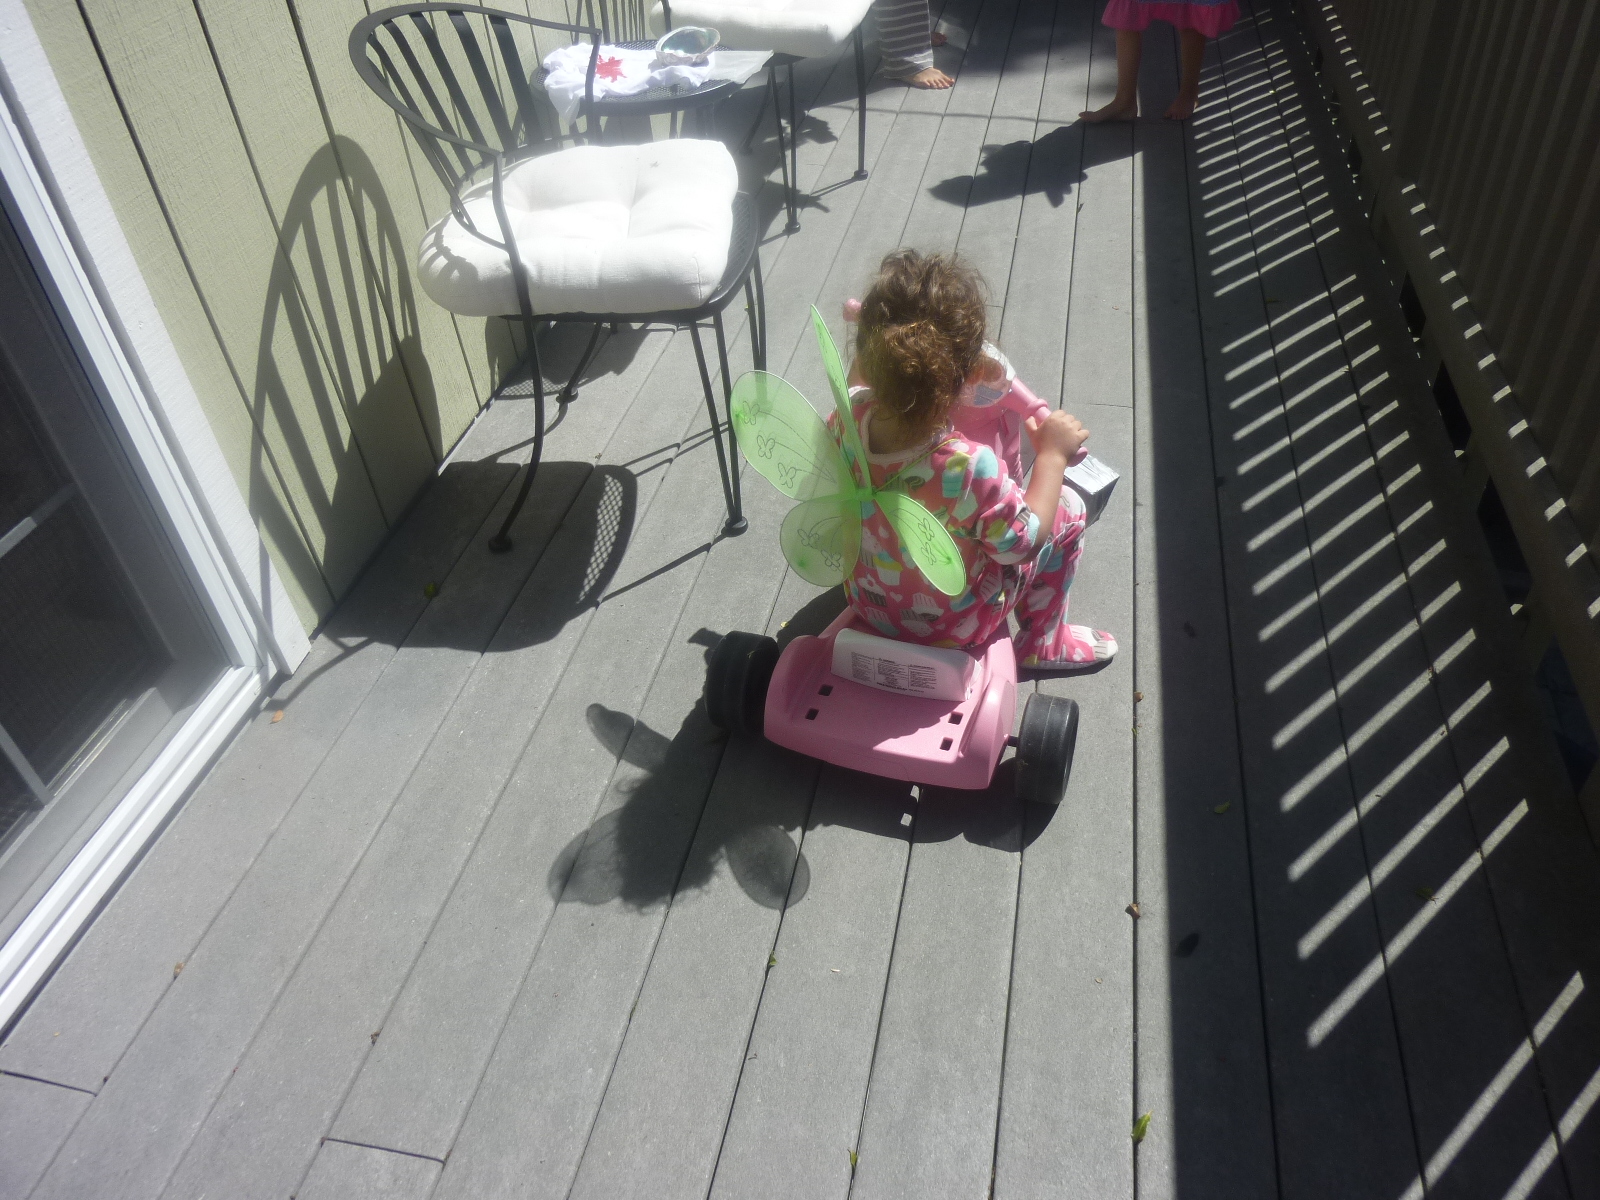
I combined fairy wings and jump ropes so that they looked like butterflies. The girls spent a lot of time on the deck playing with these.
The girls were quite proud of their creations and I enjoyed our crafting time together. And all the adults enjoyed not having bored, whiny kids around! Ha ha!
Join me at Inspire me Tuesday!
Of course, we did the normal beach activities and made many a sand castle and moat!
We made handprint crab t-shirts. This involved an adult per child as painting red paint on little hands can be quite messy! To do this, paint one hand (quite heavily) with red paint. Place on t-shirt with thumb facing toward neck of the t-shirt. Wash hand and apply red paint to the other hand. Slightly overlapping the palm, repeat the step. Once they were dry I glued eyes and made a smile with a marker.
A few days later we wore them on our trip to the Monterey Bay Aquarium!
Another morning we made caterpillar refrigerator magnets. I bought a few packages of small pom poms, regular clothespins and pipe cleaners. The girls glued in various color combinations. When done we glued a magnet to the back of the clothespins. They each had enough to keep at their homes and some to give away to their other grandparents.
We painted rocks to look like ladybugs and bumblebees, making a tic-tac-toe set. The girls had fun painting them and later playing the game!
I combined fairy wings and jump ropes so that they looked like butterflies. The girls spent a lot of time on the deck playing with these.
Join me at Inspire me Tuesday!
Subscribe to:
Posts (Atom)