Showing posts with label Quilt. Show all posts

Monday, April 15, 2019

Tax Season 2019 Projects


My 42nd tax season (yikes!) is in the books.  It’s been a tougher than usual one this year; our partner retired so we took over most of his accounts and the additional workload, we had a major tax law to learn, explain to our clients, as well as the changes it made to our tax software.  We had to put down my beloved 16-year old cocker spaniel, Harley, on March 19.  It’s just been a rough tax season but we have made it through another one!

I haven’t had a day off since February 4, literally worked seven days a week, long hours. I’ve done just basic cooking, no baking, and I’m behind on keeping up with the weeds. The laundry, thankfully, is not behind! The tendency is to come home from work and just crawl into bed.  But, that’s so unproductive! In the past I tried to keep up with my cross stitching and did a lot of reading.

Four years ago I decided to learn how to quilt with an online weekly sew-along.  It started in January and I found it to be a great stress relief from the daily grind of dealing with numbers.  Sewing, even a few minutes a night, was a great way to unwind.  My first quilt was a success and I was hooked on the hobby!  The second and third year I did a sew-along with the same instructor but they were appliqued quilts.  By the end I was pretty much over applique. In 2018 I got ambitious and did a quilt of pieced birds. In retrospect, it was over my skill level but I persevered and finished, though not until June.

This tax season I picked a much easier quilt, just some squares and rectangles to sew together in a cross tile pattern.  My goal was to finish the 20 blocks by April 15.  I finished those mid-March. 


My buddy, he was always "helping" me. This was a few nights before he passed.
 
I also joined a mystery block of the month club whereby material and pattern for that month’s block(s) arrive about the first of the month.  I’m loving the colors and designs of the fabric but the blocks are quite detailed, lots of points and half-square triangles. It’s testing my novice piecing skills.  I’ve not started April’s blocks yet but the fabric is ready to be cut out.  I still have two weeks of April left!


This quilted flower and pitcher has me so intimidated but I will jump in!
A few weeks ago another blog started a project doing a two-color quilt using instructions from a book I already had.  Yes, I caved and am now doing that sew-along (I already have it ear-marked for a birthday gift later this year).  I am on schedule, finished the second block yesterday.  The third block will be released on Thursday.
 
 
Though I wasn't home much the past three months I feel very accomplished in all I was able to get done creatively.  I can't wait to get back in the kitchen, especially to bake some goodies.  My hands long to feel some dirt instead of a computer keyboard. It's good to have free time once more!


Wednesday, February 1, 2017

Sweetie Pie Quilt Sew-Along

Last year I joined an online sew-along and made a quilt.  Each week we got new instructions, along with videos and pictures, to help us along in the process.  It started mid-January and finished mid-June.  It was a nice, easy pace and, even though a big part of it was during tax season, I managed to finish my quilt top on time.  It actually ended up being a good de-stresser for me; something to concentrate on other than numbers.

Since then I've made two more quilts with not too many disasters. My quilting confidence fairly high, I signed up for the same instructor's sew-along for this year. We are making a Dresden block quilt, she calls the blocks in this quilt "pies".  Each one has an appliqued fruit center (i.e. cherry pie, apple pie, etc.) I bought all the fabric and supplies, cut everything out (which was a huge undertaking as there are 144 little pieces just for the Dresdens, not to mention all the other pieces of the quilt!) Week one began and the first week's tasks were monumental!  We had to sew each Dresden piece into its pointed shape, then sew 16 together to get our circle, and applique those onto a 17x17-inch piece of fabric. Multiply that work by 12 blocks! Yikes!  Not only that, but I discovered that the sew-along will finish mid-March. (Obviously the instructor doesn't know this is corporation tax deadline time!) Based on what remains to be done, I now know that each week's list of tasks will be a lot.  I know I won't be able to keep up while working 7 days a week!  At first I felt pressured that I would have to make it work.  After a few days I told myself that this isn't a race; the goal is to enjoy the process, learn new skills, and have a beautiful quilt in the end!  My quilt top probably won't be done in March but I'll keep working on it until it is done!

I have the first two Dresdens ("pies") completed.  The remaining 10 Dresdens are awaiting their appliqued centers.  I have started sewing the petals for the 20 flower blocks that will also be in the quilt. So far, I am keeping up but I know that will change soon!

2 out of 12 blocks done!  The apples are for another quilt which is on the back burner for now!

All the quilt pieces are cut and waiting!

Chain-piecing 144 Dresden/pie pieces.


Getting the placement the way I want it before sewing the 16 pieces to make a circle.

Each fruit appliqued center also has some embroidery work in it.

Hopefully, my finished quilt will look like this!

Wednesday, July 27, 2016

What Would Grandma Do?

I first began sewing when I was a young girl, starting with Barbie doll outfits (why I started with them is beyond me, all those teeny, tiny pieces of fabric!) Mom & Grandma led the way in teaching me but Grandma was the taskmaster. Mom & I would practically quake in our shoes any time we gave her an item to inspect.  Grandma was an excellent seamstress and a sewing perfectionist. What I thought was a decent job wasn't to her and she would tell me to rip it out and start over. It was a happy day when I didn't have to rip anything out, that was praise enough! Of course, over the years, Grandma's lessons have stuck with me.  Now when I sew I look at my piece and question if Grandma would approve.  If not, I usually end up ripping it out and starting over!
I'm working on a quilt, my second pieced quilt.  I have all 12 blocks done and sewn together, along with sashing.  Now I'm working on the outer border.  Twice I've messed up in measuring.  I ripped it out once and started over. I sewed it again and it's not quite right.  The impatient part of me says to leave it, no one would know but me.  But Grandma lives in my sewing conscience.  I'm ripping again! And I know she's proud.

Those of you that sew, know a seam ripper is one of the most used sewing tools! I always have mine close by!

Sunday, February 21, 2016

Bloom Quilt Update

Six weeks ago I began participating in an online sew-along to make an appliqued quilt. Each week the instructor shares the instructions for another block. The finished quilt will consist of 20 different blocks. The instructions for block six will be released tomorrow, I finished block five yesterday.  Slowly, but surely, I am keeping up, even with my crazy tax season schedule!
I have now sewn the first four blocks together to make the first row of the quilt. My photography doesn't quite capture how bright and colorful the fabrics are, it's going to be a very cheery quilt!
This is my favorite block, so far, just love the colors in this one and the shape of the leaves. All the flowers and leaves of the blocks are made by using a plastic template to make the shape.  More information about the sew-along can be found here.
We are working seven days a week now, long days, lots of stress.  This quilt project has been a nice little diversion for me.  I try to do a little each night, to keep making progress, and decompress my brain some.  We have seven more weeks of tax season.  If I stay on track my quilt will be over half done by then!

Wednesday, January 20, 2016

Bloom Sew Along

I've sewn since I was a little girl, following in my Grandma & Mom's footsteps.  First it was little Barbie outfits.  In high school I made a lot of my pants and my prom dress.  After I had children I made many Halloween costumes and dresses. I never imagined I would be making quilts.  

My friend, Bernice, first convinced me to try quilting by teaching me how to make a rag quilt.  Easy, not fussy, I liked it.  Then she moved me up to making a jelly roll quilt. Again, pretty easy, no cutting of little pieces. As I perused websites looking at fabric I begin to fall in love with many of the quilts.  I thought to myself that surely I can do this, I'm not stupid.  So, I jumped in headfirst and began making a country quilt with various blocks of different designs, such as a teapot, barn, milk pail.  That has been slow going; a lot of cutting itty bitty pieces of fabric, the holidays, a little travel. I've gotten bogged down, a time or two, and had to run to Bernice for rescue.  I've only completed 3 blocks of that quilt and I've jumped into another one.

Why? There is an online sew along to make a "Bloom" quilt.  Each week the instructor guides us through one block. It started this week and will go through the middle of June. At times I wonder if I'm a blooming (yes, that was a play on words!) idiot to start this as I'm also beginning another tax season. I don't have time to sew this time of year! What am I thinking?  I'm hoping I can do a little each night, that it will be something, besides numbers, to keep the stress at bay.  Time will tell how that goes but I have completed the first block! It's so cute!

Each of the 20 blocks on the quilt are appliqued using templates as a guide.  I spent 2 afternoons cutting out all the fabric so I would have that task behind me.  If all goes well my completed quilt will look like this. 
More information about the quilt and the sew along can be found on this website.

In the meantime my three farmhouse blocks are hanging on my design board, waiting.  I don't think I'll get any more work done on this quilt until after April 15!

Friday, November 6, 2015

Sewing Advice

This is from a Singer sewing machine manual in 1949:

Prepare yourself mentally for sewing.  Think about what you are going to do. Never approach sewing with a sigh or lackadaisically.  Good results are difficult when indifference predominates.

Never try to sew with a sink full of dirty dishes or beds unmade. When there are urgent housekeeping chores, do those first so your mind is free to enjoy your sewing. When you sew, make yourself as attractive as possible. Put on a clean dress.  Keep a little bag full of French chalk near your sewing machine to dust your fingers at intervals. Have your hair in order, powder and lipstick put on.  If you are constantly fearful that a visitor will drop in or your husband will come home, and you will not look neatly put together, you will not enjoy your sewing.

Well, all I have to say is it is a good thing we are not in 1949! While I confess to making sure the bulk of my household chores are done before sewing (ask anyone, I'm uptight about my housekeeping!), I sure don't worry about my dress, hair, or lipstick! Heck, I spend many an hour at my sewing machine, unshowered, and in my pj's!  My poor Hubby, the things he has to witness!

I have been spending a lot of time in my sewing/craft room lately. I've made a few pillows and mattress pocket runners. Now I'm getting ready to jump in, feet first, into the world of quilting.  With the exception of some rag and jelly quilts, neither of which require any piecing techniques, I've done no quilting. But I've fallen in love with this quilting book, have all my materials and scraps of fabric ready to go.

If you come by my house you can expect to find me in my special room, knee-deep in fabric and thread, probably with a puzzled expression on my face, as I attempt to learn to make small pieces of fabric come together in a colorful quilt block.  What you won't find is me with perfect hair and makeup or in a nice dress! And what is French chalk anyway? Aren't you glad we aren't in 1949 anymore?


Monday, November 17, 2014

Dresden Plate Pillow

The Dresden plate quilt pattern was very popular in the 1920’s and 30’s. It is also know by names such as Grandmother’s sunburst, sunflower, and friendship ring. There are usually 12 or more “petals” that are sewn together, radiating from a central circle, and then appliqued onto a block of fabric. They often look like flowers, hence the many garden names. The "petals" may be smooth at the outer edge of the circle or shaped into arcs or points, or a combination. The center of the Dresden can be plain, embroidered, decorated with trim, yo-yo's or doilies. It's a very versatile and creative pattern.
I have a Dresden plate quilt made by my Grandma over 20 years ago.  It's gotten rather threadbare so it no longer resides on a bed. I've always loved the pattern and when she offered to make me a quilt that was my request. When Grandma made a quilt she had to make a paper pattern, trace out the pattern onto the fabric, then cut out each piece.  This was all very time consuming, of course. Modern quilters have it much easier.  There are rulers and circle guides, rotary cutters and cutting mats of all shapes and sizes. It never occurred to me to make a Dresden plate, I'm not a quilter (though I'm thinking I should attempt one!) but then I saw this tutorial and she made it look so easy.  I ordered the two rulers and got to work. It was much easier than I thought it would be.  Who knew?!!
My first Dresden plate went on a pillow for my sister's birthday. I embellished the center of the Dresden with ric rac trim and added piping to the pillow. Now it's time to repeat the process and make one for me!

I'm linking up to Inspire Me Tuesday.

Thursday, September 26, 2013

How to Make an Embroidered Signature Label

I've made two jelly roll quilts that will be part of the pile of Christmas presents our granddaughters will have under our tree. I wanted to personalize them to make them more special.  The girls are only 5 & 8 so I don't think they will appreciate (yet) the time & love that went into their quilts but they can read my sentiment every night and know that their Nana loves them!


To make my sentiment I found a font on Word that I liked (Lucida Caligraphy) and sized it to fit the design.  If you don't like any of the basic fonts there are plenty of sites on the web that have free downloadable fonts.  I was too lazy to do that. If you have nice handwriting you can do your own.  That would probably be more special but 30 years of signing tax returns has reduced my once nice handwriting to more of a scribble!

I printed my words on a plain piece of paper and taped to a window (no fancy equipment here, trust me this works!) The light coming through the window makes a great tracing medium. 
Then place your fabric over the printout.  I used painters tape as it doesn't leave a real sticky residue.  I used a washable marker to trace the sentiment. The markers can be found in the sewing section of any hobby store. I used a simple back stitch to embroider, using two strands of floss.  When done I rinsed the fabric out and the marker was gone.  Do not iron until you have rinsed your fabric, ironing will set the marker.  No need to ask how I know this.

Now is when I got really technical.  To make the heart shape I used one of my cookie cutters. Creative gadgets are everywhere!

I used a fusible web, that is made especially for appliquing, and ironed the heart onto the quilt top.  Using the blanket stitch on my sewing machine I sewed around the edges.

I'm so happy with how they turned out!  Now it's time to take them to be quilted. I need to get busy and find more fabric as I have one more quilt to get done! So many projects, so little time!

Saturday, June 8, 2013

Jelly Rolls

This is a jelly roll.

This is also a jelly roll. It is a roll of 44" long by 2 1/2" wide strips of color-coordinated fabric. 

I learned this a few months ago.  Bernice, who is an avid quilter, told me I should buy a jelly roll and make a quilt.  I told her "I don't do quilts".  She said, "you can do it and I'll teach you!"

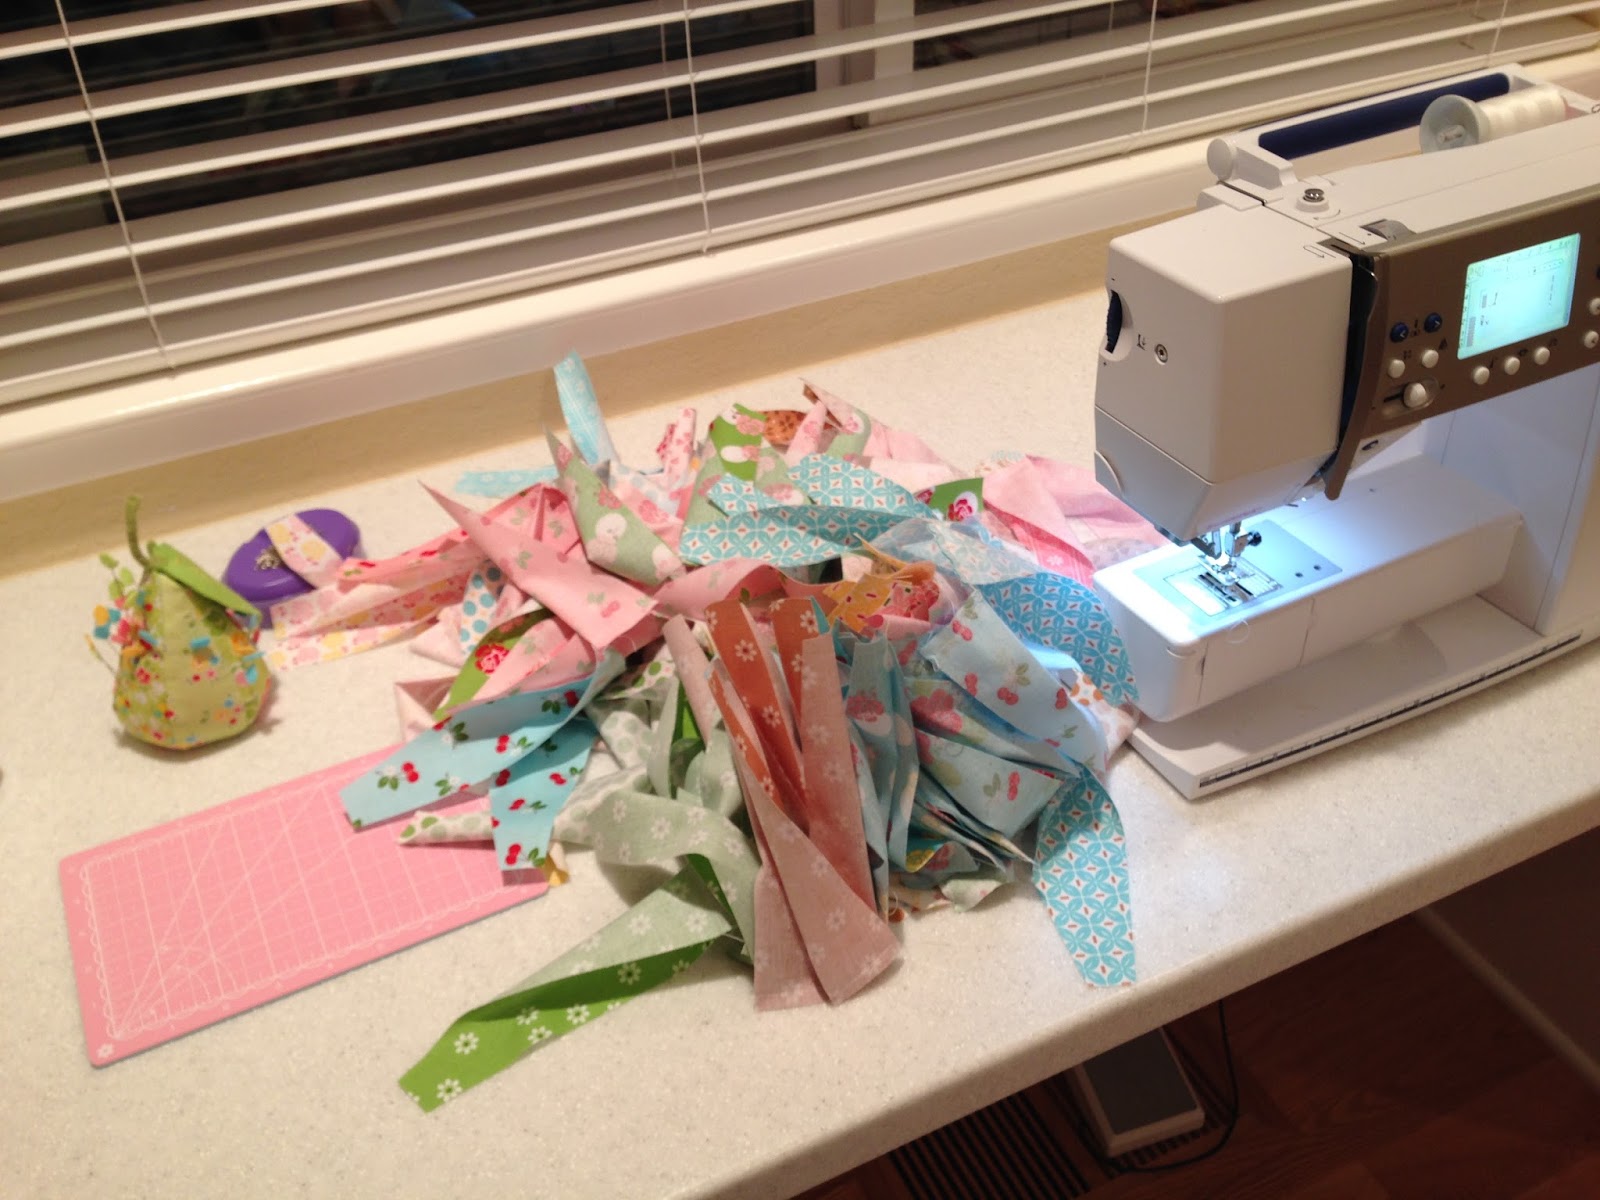
Today five women gathered in my dining area to learn how to make a jelly roll quilt top.  It was very easy!  You sew all the strips together to get one long strip of fabric...1600 inches!  Then you fold the fabric strip together, sew a seam, cut the loop at the end and do it all over again.  After sewing five seams you have a quilt top with a random arrangement of fabric from the jelly roll. In one morning we were able to get our quilt tops completed, even with all the chatting we were doing!

How can this long strip possibly become a quilt top?

Just keep sewing the strips on top of each other and they eventually do!


Of course, with all the sewing we were doing we needed a snack!  What could be more fitting than a jelly roll?  One with strawberry jam encased in a light lemon-flavored cake and topped with powdered sugar? We burn a lot of calories working those sewing machines don't you know!


Jelly Roll

6 eggs, separated
1/4 cup water
1 1/2 cups sugar, divided
1 teaspoon vanilla extract
1 teaspoon lemon extract
1 1/4 cups cake flour
1/2 teaspoon baking powder
1/2 teaspoon salt
1 teaspoon cream of tartar
1 jar (12 ounces) strawberry, raspberry or currant jelly or jam
Confectioners' (powdered) sugar

Place egg whites in large bowl; let stand at room temperature for 30 minutes.  Line a greased 15-inch x 10-inch x 1-inch baking pan with waxed or parchment paper; grease the paper and set aside.

In a large bowl, beat egg yolks and water on high speed for 5 minutes or until thick and lemon-colored.  Gradually beat in 1 cup sugar.  Stir in extracts.  Sift flour, baking powder and salt together twice; gradually add to yolk mixture and mix well (batter will be very thick).


In a large bowl with clean beaters, beat egg whites and cream of tartar on medium speed until soft peaks form. Gradually beat in remaining sugar, 1 tablespoon at a time, on high until stiff peaks form.  Gradually fold into batter.  Spread evenly into prepared pan.

Bake in a preheated 350 degree oven for 15-18 minutes or until cake springs back when lightly touched. Cool for 5 minutes. Invert onto a kitchen towel dusted with confectioners' sugar.   Gently peel off waxed paper. Roll up cake in the towel jelly-roll style, starting with a short side.  Cool completely on a wire rack.  Unroll cake; spread evenly with jelly.  Roll up; dust with confectioners; sugar.

Invert the warm cake onto a clean kitchen towel sprinkled with confectioners' sugar.

Roll up cake. This must be done while the cake is still warm.  Then cool completely.

Once cool, unroll and spread with jam.  It will easily roll back up to its jelly roll shape.

 
Bernice brought some of her completed jelly roll quilts for us to look at.  Someday, perhaps, I'll be able to make ruffled flowers and appliqued ladybugs, too!  Maybe next class?
 
 
This week I'm joining in at:
 
 
StoneGable