Thursday, June 9, 2016

Orange Olive Oil Brownies

Growing up, Mom never used olive oil in her cooking.  I've gravitated to where that is the oil I use the most.  I especially like flavored olive oils, they add an additional layer of flavor to a dish. I use lemon olive oil a lot when cooking fish and basil olive oil in Italian dishes. I even have a jalapeno-flavored olive oil which is great in Mexican dishes. I keep all my olive oils and flavored vinegars on the countertop next to my stove.  They are easy to get to and are pretty on the counter!

I've not baked much with olive oil, however.  I've seen recipes and thought to myself that I should try it, but it's never happened.  Last week I ran across this recipe for brownies and knew I had to jump in.  I found the recipe on the Sciabica Olive Oil website.  Sciabica's is a local company, I am fortunate that I can find their offerings in local stores and at our Farmers' Markets. Until he died in his mid-90's Mr. Sciabica was at the Farmers' Markets on a regular basis, enthusiastically telling everyone how wonderful olive oil is!

I happened to have orange olive oil and some ripe bananas so I had no excuse not to try these.  We really enjoyed them.  There is a subtle orange flavor to them and they are very moist. I could definitely taste the bananas in them.  For a more neutral flavor the applesauce would work. They are more cake-like than fudge-like which is how I like my brownies. To make them less "chocolately" you can omit the chocolate chips in the batter and replace the frosting with a powdered sugar dusting. I liked them with everything!

Orange Olive Oil Brownies

1 cup flour
1 cup sugar
1/3 cup cocoa
1/2 teaspoon salt
1/2 teaspoon baking soda
2 eggs
3/4 cups mashed bananas (about 2 medium) or applesauce
3 tablespoons orange olive oil
2 teaspoons vanilla
1/2 cup semi-sweet chocolate chips
1/2 cup walnuts, chopped


Preheat oven to 350 degrees. Spray baking spray in a 9x9-inch square baking pan.

In a medium-sized bowl, mix the flour, sugar, cocoa, salt, and baking soda.  Add the eggs, mashed banana, vanilla and olive oil; mix again.

Add chocolate chips and nuts and mix until just blended.

Pour mixture into pan and bake for 30-35 minutes or until the center is done.

While the brownies are hot, pour more chocolate chips evenly over the top. Let sit for 5 minutes then, using an offset spatula, spread melted chocolate over the brownies.  Refrigerate for 30 minutes to set the chocolate.


Thursday, June 2, 2016

Apricot, Almond & Orange Biscotti

When the weather is nice, every Saturday morning finds my granddaughter and I sitting on the back steps enjoying some cinnamon toast, hot chocolate, and a latte. It's the tail-end to our Friday night sleepovers, before I deposit her back with her parents.  She jabbers non-stop, we enjoy watching the birds and Harley play.  It's special time, I hope when I'm long gone from this world, she looks back fondly on these moments with her Nana. But I don't just spend  Saturday mornings out there.  On many mornings you can find me out back, sipping on a latte and enjoying a quiet start to my day. This week I've enjoyed  a few of these biscotti with my latte.


Biscotti basically means a twice-baked biscuit.  The dough is formed into an oblong log and baked. Once cooled, it is cut into slices and each side baked a little longer.  The result is a slightly crispy treat.  This one is filled with some of the bounty from my agricultural region, apricots and almonds. A little bit of orange enhances the flavor of them. It is a great combination!

For best results, use California dried apricots.  I grew up in Apricot Country and California "cots" are the best!


Apricot, Almond & Orange Biscotti

1 cup all-purpose flour
1/2 cup sugar
1 teaspoon baking powder
2 eggs
1/2 cups almonds, coarsely chopped
1/2 cup dried apricots, sliced
Juice & zest of 1/2 orange

Heat oven to 325 degrees and line a cookie tray with parchment paper.

Sift the flour and baking powder in a bowl, then stir in the sugar. Add the almonds and apricots.

Lightly beat the eggs and add to the mixture along with the orange juice and zest; mix until combined.

On a well floured surface, roll the mixture out onto a log about 3 ½ inches wide. The  biscotti mixture is quite wet you can be really liberal with the flour here to avoid sticking. Keep your hands well floured to roll and shape the log. Transfer to prepared baking sheet.

Bake for 18-20 minutes, until a slight golden crust has formed. Remove from the oven and allow to cool on the tray completely.

Reduce the oven temperature to 300 degrees. Once cooled, transfer the log to a cutting board and, with a sharp kitchen knife or serrated bread knife, diagonally cut the log into biscotti about ½ an inch in thickness.

Place the biscotti back on the baking sheet, with cut side exposed.  Return to oven and bake for 10 minutes on each side until lightly golden.  Remove from oven and cool for 5 minutes before turning out onto a wire rack to cool completely.

Cutting the baked biscotti loaf into diagonal slices leaves more surface area to toast.


Tuesday, May 31, 2016

Caribbean Corn Bread

About 15 years ago, I read the book, A Trip to the Beach, by Robert & Melinda Blanchard. It's the story of how a couple uprooted themselves from their long-time home in Vermont to the Caribbean island of Anguilla where they opened a restaurant called Blanchard's Restaurant.  It was a great read and I was delighted when they came out with a cookbook a few years later. I've since pared down my once-substantial cookbook collection, but this is one of the books I deemed good enough to keep. The recipes are casual, meant for home cooks, and incorporate recipes from their New England roots, as well as Caribbean influenced ones.
Recently I grabbed the cookbook off my bookshelf and browsed through it (going through old cookbooks is like visiting a long-lost friend!)  I was reminded that there were some recipes I had made and enjoyed, as well as some I would like to try. One recipe I've made numerous times is their Caribbean cornbread. It's not your normal kind of cornbread.  It's moist and rich, with kernels of corn, Monterey Jack cheese and bits of crushed pineapple.  It was a great accompaniment to the smoked pork ribs my son made for dinner.

Caribbean Corn Bread

1 cup all-purpose flour
1 cup cornmeal
2 tablespoons baking powder
1 teaspoon salt
1/2 pound (2 sticks) unsalted butter, at room temperature
3/4 cup sugar
4 eggs
1 can cream-style corn
1/2 cup canned crushed pineapple, drained
1 cup shredded Monterey Jack cheese

Preheat the oven to 325 degrees.

Butter and flour a 9-inch square glass cake pan.

In a medium bowl, whisk together the flour, corn meal, baking powder, and salt; set aside.

In a mixer, cream the butter and sugar.  While the mixer is running, add the eggs, one at a time, beating well after each addition.  Add the corn, pineapple, and cheese, and mix to blend.  On low speed, add the dry ingredients and mix until blended well.

Pour the batter into the prepared pan and bake until a tester (or skewer) inserted in the center comes out clean, about on hour to an hour and fifteen minutes.  Do not undercook the cornbread.  It should be golden brown on top when done.

Saturday, May 28, 2016

A Polka-Dotted Sugar Cookie Kind of Day!

My daughter-in-love asked that I make some star-shaped sugar cookies that she could give to her fellow teachers on the last day of school (can you believe school is out for the year?) Like most baking projects, if you're going to do "some" you might as well do "more", so I decided to make some cookies for my granddaughter to give to her teachers. I've been wanting to use this mason jar cookie cutter for a while; this was my day to do so.  I liked the polka-dotted effect so much that I continued with them on the stars. Sixty-some cookies later and a gazillion polka dots, I was left with a sore back and a messy kitchen!  And, somehow, I find this fun!


Photobombed by Harley's duck!

My piping skills aren't the best, but each time I do cookies I get better.  I should just get over the fact that my cookies won't ever look like the professional ones I see! But, they turned out cute and I got to release some creative juices!


The school colors of my daughter-in-love's school are red and white.  As this is Memorial Day weekend I went a little patriotic.  She made cute tags and bagged them for her staff.

If I've learned anything in my almost-60 years it's that organization pays dividends.  Last fall I organized all my cookie baking and decorating supplies so that things were easier for me to locate.  It took me 10 seconds to figure out what box the cookie cutters I needed were in!  Before I begin decorating the cookies I have the area organized with all the supplies and the icing in bags and bottles of the colors I'm using.  Once that's done I can devote my time strictly to decorating.  I don't have to take the time to make another color of icing, get out the sprinkles, etc. It works for me!

Monday, May 23, 2016

Raspberry Rhubarb Almond Bars

I love raspberries (ok, I love every kind of berry!), rhubarb, and anything with almond paste in it.  Naturally, when I ran across this bar recipe, I knew I would have to make them.  What's not to love about a raspberry rhubarb jam nestled between layers of buttery, almond-flavored shortbread? They are so good!
 
 
The jam can be made ahead of time and kept refrigerated for up to 2 weeks.  I'm sure the jam would be good on toast or muffins, too. 

Like all bar recipes, this makes a lot of dessert.  They are great for potlucks and picnics.  I shared with neighbors and friends!

Raspberry Rhubarb Almond Bars

2 cups chopped (1/2-inch pieces) rhubarb (2 large stalks)
1 1/2 cups fresh raspberries
1/2 cup granulated sugar
1 teaspoon vanilla extract
2 teaspoons fresh lemon  juice

7 oz. almond paste
2 cups flour
1 cup powdered sugar
3/4 teaspoon salt
1 teaspoon baking powder
8 oz. (2 sticks) cold unsalted butter, cubed
1/2 teaspoon almond extract

Combine the rhubarb, raspberries, sugar, vanilla, and lemon juice in a medium saucepan over medium heat. Stir occasionally while it heats up and the sugar melts.  Once it comes to a simmer, lower the heat to medium-low and continue to cook the jam until the fruit breaks down, most of the liquid boils off, and it has a thick, jam-like texture (it will continue to thicken as it cools). Stir occasionally to avoid scorching. This should take 15-20 minutes.

Remove from heat and cool to room temperature before using. It can be made in advance and kept refrigerated for up to 2 weeks.

Preheat the oven to 350 degrees.  Line a 9x13-inch baking pan with foil, leaving an overhang on the ends.  Spray the foil with nonstick cooking spray.

Coarsely chop the almond paste into pieces and put it in a food processor.  Process in long pulses until almond paste is in fine crumbs, then remove it from the processor.

Place the flour, powdered sugar, salt, and baking powder in the processor, and pulse briefly to combine.  Add the cold cubed butter, and pulse in long pulses until the mixture is crumbly, but holds together if you press a ball of it between your fingers.  Add the almond paste crumbs and almond extract, and process in short bursts until it's well-mixed. (The dough will still be crumbly).

Separate out about 1 1/4 cups of the crust and set it aside for later.  Take the remaining crust mixture and press it into an even layer in the bottom of the prepared pan.  Bake the bottom crust for 15 minutes, until it is puffed and just starting to take on some color.

Spread the jam out into an even layer on the baked crust, and sprinkle the reserved crust mixture over the top (it will puff and spread as it bakes).

Bake the bars for an additional 30 minutes, until the filling is bubbling and the top crust is golden brown.  Remove from the oven and cool to room temperature.

Using the foil as handles, remove the bars from the pan and cut them into small squares. 

Bars can be kept in an airtight container in the refrigerator for up to a week.

(Recipe adapted from www.sugarhero.com).

Extra foil on the ends allows for easy removal of the cooked bars.

Thursday, May 19, 2016

Blueberry BBQ Chicken

It's blueberry picking time at the local U-pick blueberry farms in our area.  Last Saturday my granddaughter and I spent about an hour picking blueberries (and cherries!)  This was our second year to do so and she was quite enthused about going. We laughed and chatted, while getting a bounty for the freezer. It was very good Nana-granddaughter bonding time!


I made a pie with the cherries and froze most of the blueberries.  With the remainder I made this blueberry BBQ sauce that we used for chicken.  I found the recipe on the Big Green Egg website. We don't have a Big Green Egg but the chicken was easily cooked on our BBQ grill.
Oh, the sauce is so good!  It's very thick, sweet, with a slight touch of acidity, due to the vinegar.  According to the website, the sauce keeps for months when refrigerated.  I can't wait to have some on ribs!

Blueberry BBQ Sauce

3 cups blueberries
2 cups apple cider vinegar
2 cups granulated sugar
1 teaspoon salt
One 3-inch cinnamon stick
1 bay leaf
1/4 teaspoon red pepper flakes

Combine the blueberries and a little of the vinegar in a food processor.  Pulse the berries just to break them up.  You're not trying to achieve smooth berries at this point; you just want to get some blue juice flowing. In a Dutch oven or 4-quart saucepan, combine the pulsed blueberries and the remainder of the sauce ingredients. Bring to a simmer over medium heat and cook for one hour, covered.  Give it a stir from time to time to avoid scorching the bottom.

Remove bay leaf and cinnamon and carefully transfer the sauce to a blender.  Pull the little knob off the top of the lid and cover it with a dish towel to prevent a mess. (This resulted in a blueberry sauce-infested towel for me.  Next time I will process the mixture in batches to avoid overflow!) Blend the sauce to get it as smooth as you can, then strain through a fine mesh strainer.  Transfer strained mixture back to pan.  Cook to reduce the sauce by one-third.  The sauce should coat the back of a spoon and have the viscosity of maple syrup. Refrigerate overnight.

For the chicken, I had my butcher "spatchcock" the chicken.  This cuts out the backbone and sternum so that the chicken can be flattened.  (This can be done at home but cutting chicken isn't my favorite thing to do!)  Bring the chicken to room temperature and season with salt and pepper.

Preheat the grill to 350 degrees.  Place the chicken skin-side up on the grill and roast for 20 minutes, then begin basting with the blueberry sauce every 5 minutes for an additional 20 minutes of cooking.  After 40 minutes of total cooking time, turn the chicken over the caramelize the skin and baste the other side 10 more minutes. Using a thermometer, check the temperature of the thigh.  Once it's at 165 degrees, remove the chicken.  Let rest for 10 minutes, then cut the chicken into pieces.  Serve with additional sauce, if desired.


Monday, May 16, 2016

The Barn!

About 15 years ago, we bought some acreage in my hometown, about 20 miles from where we live now.  We wanted a little land, my husband wanted a shop building. So we met with an architect and began to set things in motion. But, we both found ourselves not being very enthused about the project and sat down one night to discuss.  We found out that we were pretty much on the same page.  Though the allure of having a large piece of land and the dreams of what it would all look like was nice, the reality wasn't so alluring.  At our age, we didn't want to be bogged down with such a huge financial responsibility, commuting to work wasn't appealing to us, and thinking about developing and maintaining eight acres to the standards we wanted was overwhelming.  We sold the land and remodeled our existing home.

We love our home, it has most everything we want and need.  We are blessed to be surrounded by wonderful neighbors.  We "only" have a two-car garage.  For most, that would probably be acceptable.  For a family with a race car, two motorhomes, a Harley-Davidson motorcycle, and nine bicycles...well, let's just say the garage gets crowded!  And that doesn't count gardening equipment, tool boxes, etc. ! My Hubbers loves to tinker in the garage and there was no room to do so!  While perusing Pinterest last winter I started looking at outdoor sheds, a place where we could store the gardening equipment and free up a little space in the garage. We contacted our contractor and made plans to proceed.  My only input was that I wanted it to look like a little barn and something that was architecturally pleasant.  One of our visions for the acreage we bought was a shop that looked like a barn. This is a much smaller version but I think we succeeded with the barn look!

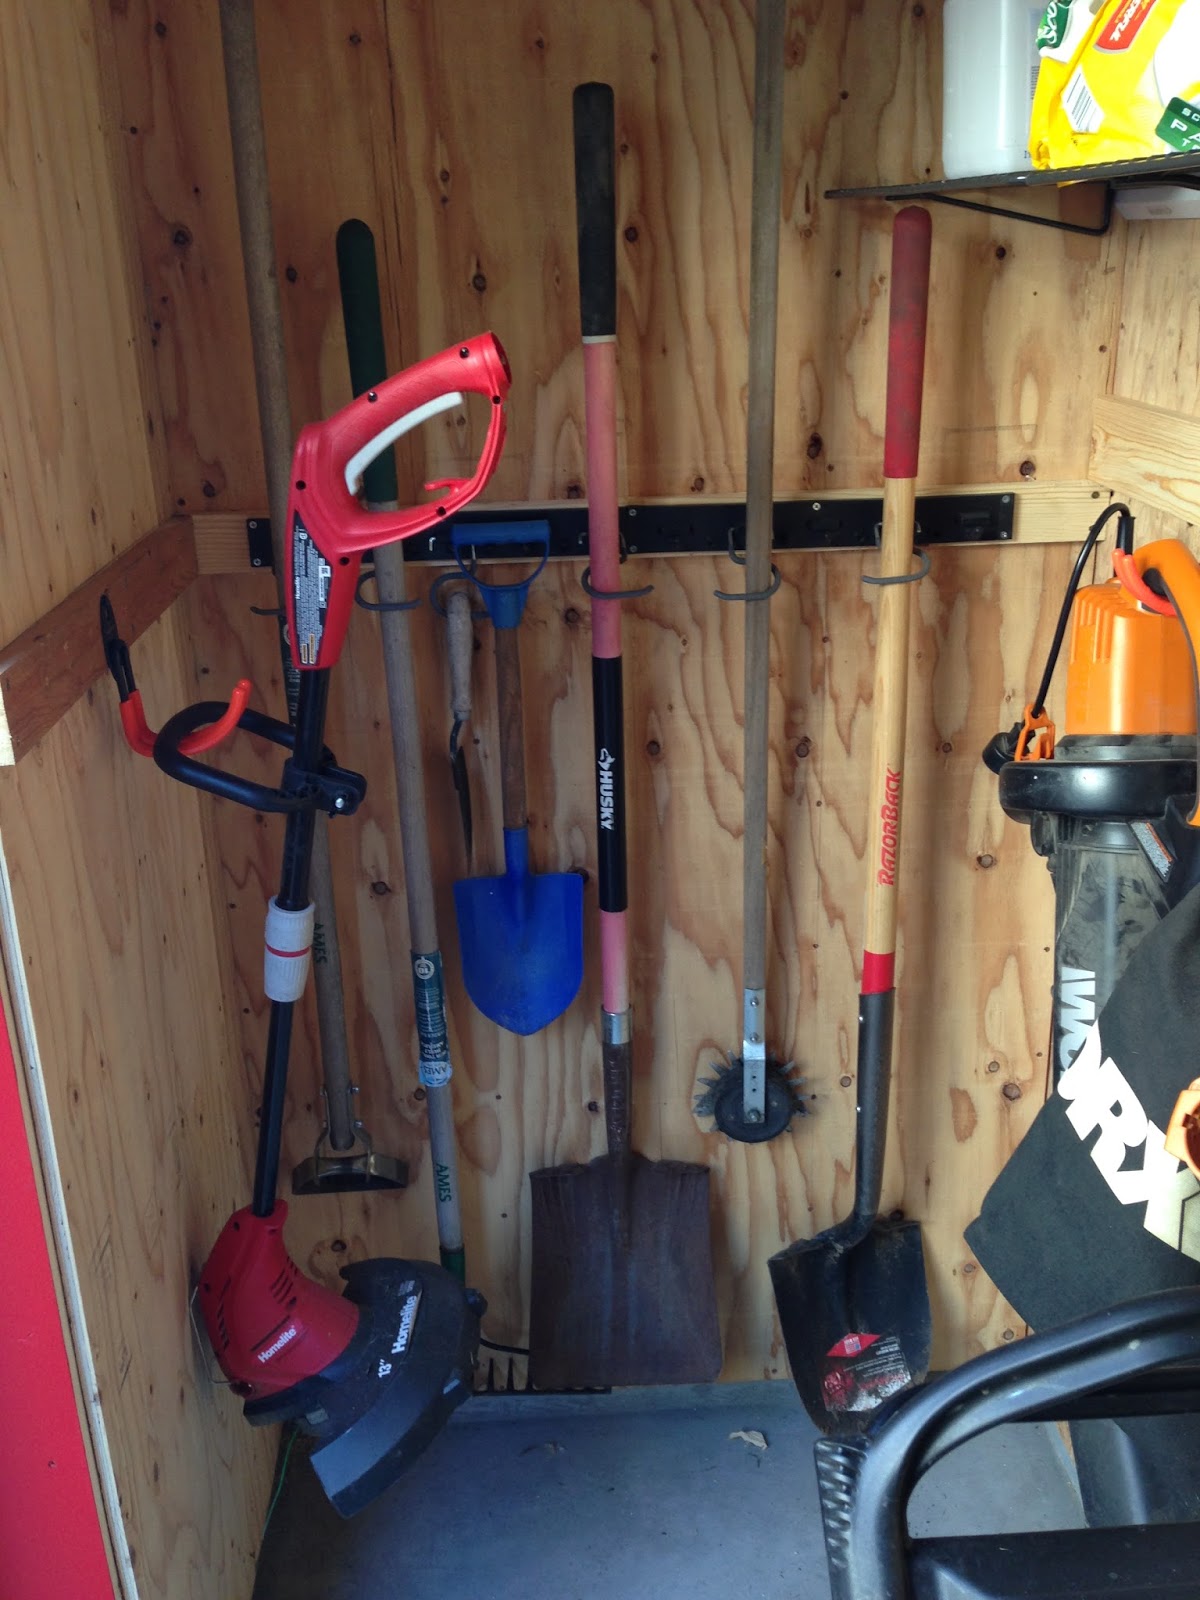
The "barn" is nestled to the side of our house. It is only 4'x9' but that ends up being a lot of storage space. It now hides the view of all the swimming pool equipment, which is an added bonus! Prior to the barn being here, we had 2 chairs and a small table in the spot.  It was a nice shady place to sit in during the late afternoon but it wasn't used very often. The barn is a much better utilization of the space.

A barn isn't complete without a flag so we hung up a small wooden flag.  A galvanized wash bucket, planted with flowers, softens up the area a bit and adds to the ambience of the nearby porch.  I'm on the hunt for a few antique farm pieces to put out, too.
All our gardening items now fit in the barn.  The bikes are hung from the ceiling in the garage.  My Hubbers now has room to putz and putter!  We have a barn without the hassle of having to maintain all those acres of land!  It has all worked out!


I'm linking up to Inspire Me Tuesday