Sunday, July 14, 2013

Sunday Gardening

It was a nice morning to be doing yard chores, not too hot yet, slight breeze, the birds & bees flitting about making all sorts of noise! I find working in my flower beds to be relaxing and restoring to my soul.

An apricot colored hibiscus with a deep pink center.  My cheapo camera doesn't show the vibrancy of the colors!

My first-ever topiary experiment! The frame is of a cocker spaniel, the only dogs our family has had.
 
 
Vinca in an old wine barrel.  At one time it was a water fountain, with water coming out of a galvanized watering can into the barrel.  We had two problems, the cans kept rusting out and the wine barrel wouldn't hold the water well. So it's now a planter!
 
Morning glory vine.  I didn't plant seeds this year, this came up all on its own!


The sunflower heads are almost ready to open!  They have gotten huge this year!
 
 
Coneflower, starting their mid-summer petal drooping. 
 
Lantana.  Notice how there are only flowers on one side?  Harley eats the flowers off this bush! Why is beyond me!
 

Thursday, July 11, 2013

Mermaid Sugar Cookies

I've been "tinkering" with sugar cookies for 5 or 6 years now. I get so inspired by the beautiful creations I see online. Mine don't compare to some of the masterpieces but, with each batch, I'm getting better. There are a few websites I follow, I look at their tutorials, read their tried 'n true techniques.  Over time I've found a process that works best for me. Yes, they are time consuming, but  it is fun to watch a plain cookie turn into a culinary piece of art. And they taste great, too!

Our middle granddaughter turned 5 today. How that is possible is beyond me, time is moving much too fast.  She had a "Little Mermaid"-themed swim party at her other Grandma's house. I was requested to bring the sweets. So, basic vanilla cupcakes (she is quite the picky eater!) were for the party and mermaid sugar cookies were to give to her guests.


I had three goals in mind when taking on this task: (1) that people could definitely tell the cookies were mermaids, (2) that they somewhat resemble Ariel and (3) that Kiera be happy with them. My goals were met!

To add texture to the cookies I sprinkled a crystal-like sugar on the fin part of the mermaid.  Her bra was added after the first coat dried to also provide more dimension.  I wish I was talented enough to have piped Ariel-looking eyes and lips but this is the  best I can do!


Here are the recipes I use for my sugar cookies:

Sugar Cookies

4 cups flour
1/2 teaspoon salt
1 teaspoon baking powder
1/2 lb. (2 sticks) butter, room temperature
2 cups sugar *
2 large eggs, room temperature
2 teaspoons vanilla *

(I often use vanilla sugar that I keep in a container on my counter. I then omit the liquid vanilla.)

In a large bowl, sift flour, salt and baking powder; set aside.  In the bowl of an electric mixer, fitted with paddle attachment, beat butter and sugar on medium speed until fluffy.  Beat in eggs and vanilla.  Add flour mixture and mix on low speed until thoroughly combined. Divide dough in half, shape into 2 discs, and wrap tightly in plastic wrap.  Chill at least 1 hour.

Preheat oven to 325 degrees.

Have parchment-lined baking sheets ready.  Take dough out of fridge and let stand at room temperature to temper slightly.  Dust work surface with flour.  Roll dough to 1/4" thickness. Cut into desired shapes and place on baking sheets.  Place baking sheets in fridge and chill until dough is firm, about 15 minutes.  Bake 15 to 18 minutes or until edges just begin to brown, rotating halfway through baking time.  Cool on wire racks.

Royal Icing

2 pound bag (8 cups) powdered sugar
6 tablespoons meringue powder
1 cup warm water
1-2 teaspoons clear vanilla extract or other flavorings, like lemon, mint, orange extract or almond flavoring.

Put sugar and meringue powder in a large mixing bowl.  Add warm water and vanilla and beat on slow to medium speed for 8-12 minutes.  Beat until the icing thickens and can stand in peaks.  Add more water, a little at a time and continue mixing slowly until you get the consistency you want.

Divide and color, fill pastry bags or squeeze bottles and seal until ready to use.  If you leave the icing uncovered, it will dry hard.

My tips:

I usually make the sugar cookie process a multiple-day process.  I'll make the dough one night, cut out and bake the next, frost the night after (I'm a CPA by day so nights are my creative time!)

To decorate I pipe an outline using a pastry bag.  With a squeeze bottle and thinner icing I flood to fill in.

I find the cookie decorating process to be much easier when I have everything prepared and organized before starting to decorate.  I color all my frosting, put into pastry bags and squeeze bottles, have sprinkles or other decorations ready, wet paper towels, toothpicks (good for getting icing into the corners).  Once I have everything in place, then I start an assembly line of cookies!

Royal icing takes a while to completely dry so make sure to give the cookies adequate time to dry before putting in gift bags (and you want to know why I know this?!!)

To get more information and to read (some are on video, which are really helpful!) some great tutorials check out these websites:

Sweetopia
Bake at 350
The Decorated Cookie

And here is our birthday girl!


Friday, July 5, 2013

Mango-Glazed Salmon

This is a very easy recipe to put together, another one that just goes to show that you don't have to spend hours putting a nice meal together. I've even made the glaze a day in advance, refrigerated it, then warmed up before cooking.  This makes a weeknight dinner even quicker! In the summer we usually do this on the outside grill.  Who wants to turn their  broiler on when it's already  hot in the kitchen!

The cast of characters.  (Note that the recipe calls for fresh ginger.  I forgot to buy any, didn't have any in the freezer.  As it was already getting close to 100 degrees outside I wasn't going back to the store! The online calculators said that 1 teaspoon ground ginger equals 1 tablespoon fresh, so that's what I used.  It was fine.  Sometimes you just have to adjust to the situation and ingredients at hand!)
Cinnamon stick and star anise. Star anise is a  star-shaped, dark brown pod that contains a pea-size seed in each of its eight segments. Native to China, star anise comes from a small evergreen tree. It's flavor is slightly more bitter than that of regular anise seed. Asian cooks use star anise to give a licorice flavor to savory dishes, particularly those with pork and poultry. It's available whole or ground and is an ingredient in Chinese five-spice powder. Use it sparingly--a little goes a long way. It adds a really nice flavor to this dish.


Mango-Glazed Salmon

1 (11.5-ounce) can mango nectar
2 tablespoons soy sauce
1 tablespoon minced fresh ginger (or 1 teaspoon dried)
1 (3-inch) cinnamon stick
1 star anise
1 teaspoon rice vinegar
6 (6-ounce) salmon filets (about 1-inch thick)

Stir together the first six ingredients in a small saucepan.  Bring to a boil; reduce heat and simmer, uncovered, 25 minutes or until reduced to 3/4 cup.  Pour mango mixture through a wire-mesh strainer; discard solids.  Return mango mixture to saucepan; keep warm.

Place salmon on a lightly greased rack in a broiler pan. Broil 5 1/2 inches from heat 5 minutes.  Brush fish with 1/3 cup mango mixture.  Broil 3 more minutes or until fish flakes with a fork.  Spoon remaining mango mixture evenly over fish.


I made this dinner for my Hubby's birthday.  He's an avid bicycle rider.  When I found these napkin rings I knew they belonged in our home! We probably should have taken the salmon off the grill a little earlier as the glaze burns easily.  Everything was fine, the salmon was just right. I got so excited showing him the napkin rings that I forgot to check on the fish!  Oops!

Thursday, July 4, 2013

Root Beer (or Orange Crush) Ice Cream

I'm a food snob.  I admit it. I think food should be prepared with the freshest, finest ingredients. I believe it doesn't take much more effort to make a meal or baked good from scratch instead of from a box or can (and it's more economical).  Unless I'm making cake pops for grandkids, you'll rarely see me cooking with processed food items. This snobbism definately applies to ice cream.  In my opinion, ice cream should be made with cream (screw the calories!), fresh eggs if making a custard base, fresh and in-season fruit. So when a family friend gave me a recipe that called for sweetened condensed milk and soda I was not optimistic. I made the requested recipe at a drag race we were at and instantly fell in love with this ice cream.  It's now become a family favorite.

The original recipe calls for Orange Crush soda. Eating the ice cream is like eating a 50/50 bar.  Last summer I decided to try it with root beer.  As my parents owned an A&W Root Beer drive-in during the mid-70's, root beer is near and dear to my family's heart. Using root beer instead of the orange soda is like tasting a frozen root beer float (and I made plenty of those during my working days at the drive-in!) This version made it to our 4th of July celebration this year. So use whichever soda you like best.  I guarantee you and your guests will find this a very refreshing ice cream!

Orange Crush (or Root Beer) Ice Cream

2 cans Eagle brand sweetened condensed milk
1 pint whipping cream
6 cans Orange Crush (or root beer) soda

Mix sweetened condensed milk and whipping cream.  Pour into ice cream container.  Add soda.  Process according to ice cream makier instructions.

It does make a lot of ice cream.  We had a smaller crowd today so I halved the recipe and made it in my refrigerated ice cream maker.  To make the full batch you will need to use a standard/rock salt kind of ice cream maker.

Our official taste tester gave this ice cream a rave review!


Join me at Foodie Friday for more great recipes!

Monday, July 1, 2013

Happy birthday, Mom!

Today is my mom's 75th birthday.  Three-quarters of a century. She's seen some changes in her lifetime!  She's been married for 57 1/2 of those years.  She had four children by the age of 24! She has 8 grandchildren and 6 great-grandchildren (I hope I'm counting right!)


Moms and daughters seem to have up 'n down relationships.  When we are young we think our dads can hang the moon.  The moms, who have been taking care of the home, the children, the homework, you-name-it, get to play second fiddle.  But as young girls turn into women  our eyes begin to open and we begin to truly appreciate all our mothers did for us, we begin to see how strong our moms are.  Of course, when we have children of our own, it really sinks in and we finally understand the depth of a mother's feelings for her child.


I know (especially in my teenage years) I've crushed my mom's heart a time or two, hurt her feelings.  Not intentionally, just asserting my independence or lack of patience over something stupid. As a mother to a daughter I've experienced the same thing, payback is definately a bitch! But, mom loves me anyway!

Growing up I always felt I had more in common with my dad.  He's a drag racer, lives for cars and I've followed in his footsteps every step of the way. But I have a lot in common with mom, too.  We both love to read, especially murder/mysteries. She (along with her mom) taught me how to cook, bake, sew, all activities that I enjoy to this day. She's always up for a day trip to San Francisco, a drive to a tea room, hitting some antique shops. Looking through older eyes I can see that I've always been a combination of the two.


She's set an excellent example of sticking to your morals, sticking to your commitments,  being a compassionate person, a good wife, mother and grandmother. She's always doing for others, whether it be baking them a treat or a gift from her sewing room.

To quote Abraham Lincoln, "All that I am or ever hope to be, I owe to my angel Mother".

Happy birthday, Mom!  I love you!

I'm linking up to Inspire me Tuesday, I can't think of anyone or anything who inspires me more than my mom! 

Monday, June 24, 2013

Beach Week Crafting

My hubby and I recently rented a house in the beach community of Aptos. During the course of the week, our three children, daughter-in-law and three granddaughters were able to join us. Knowing we couldn't be on the beach 24/7 I packed a few crafting projects that we did in the mornings. It helped fill up our days and keep boredom at bay for an 8, 5 and almost 3 year old. Many of the craft ideas were Pinterest-inspired.  Love that site!

Of course, we did the normal beach activities and made many a sand castle and moat!


We made handprint crab t-shirts.  This involved an adult per child as painting red paint on little hands can be quite messy!  To do this, paint one hand (quite heavily) with red paint. Place on t-shirt with thumb facing toward neck of the t-shirt.  Wash hand and apply red paint to the other hand.  Slightly overlapping the palm, repeat the step. Once they were dry I glued eyes and made a smile with a marker.


A few days later we wore them on our trip to the Monterey Bay Aquarium!


Another morning we made caterpillar refrigerator magnets.  I bought a few packages of small pom poms, regular clothespins and pipe cleaners.  The girls glued in various color combinations.  When done we glued a magnet to the back of the clothespins. They each had enough to keep at their homes and some to give away to their other grandparents.


We painted rocks to look like ladybugs and bumblebees, making a tic-tac-toe set. The girls had fun painting them and later playing the game!


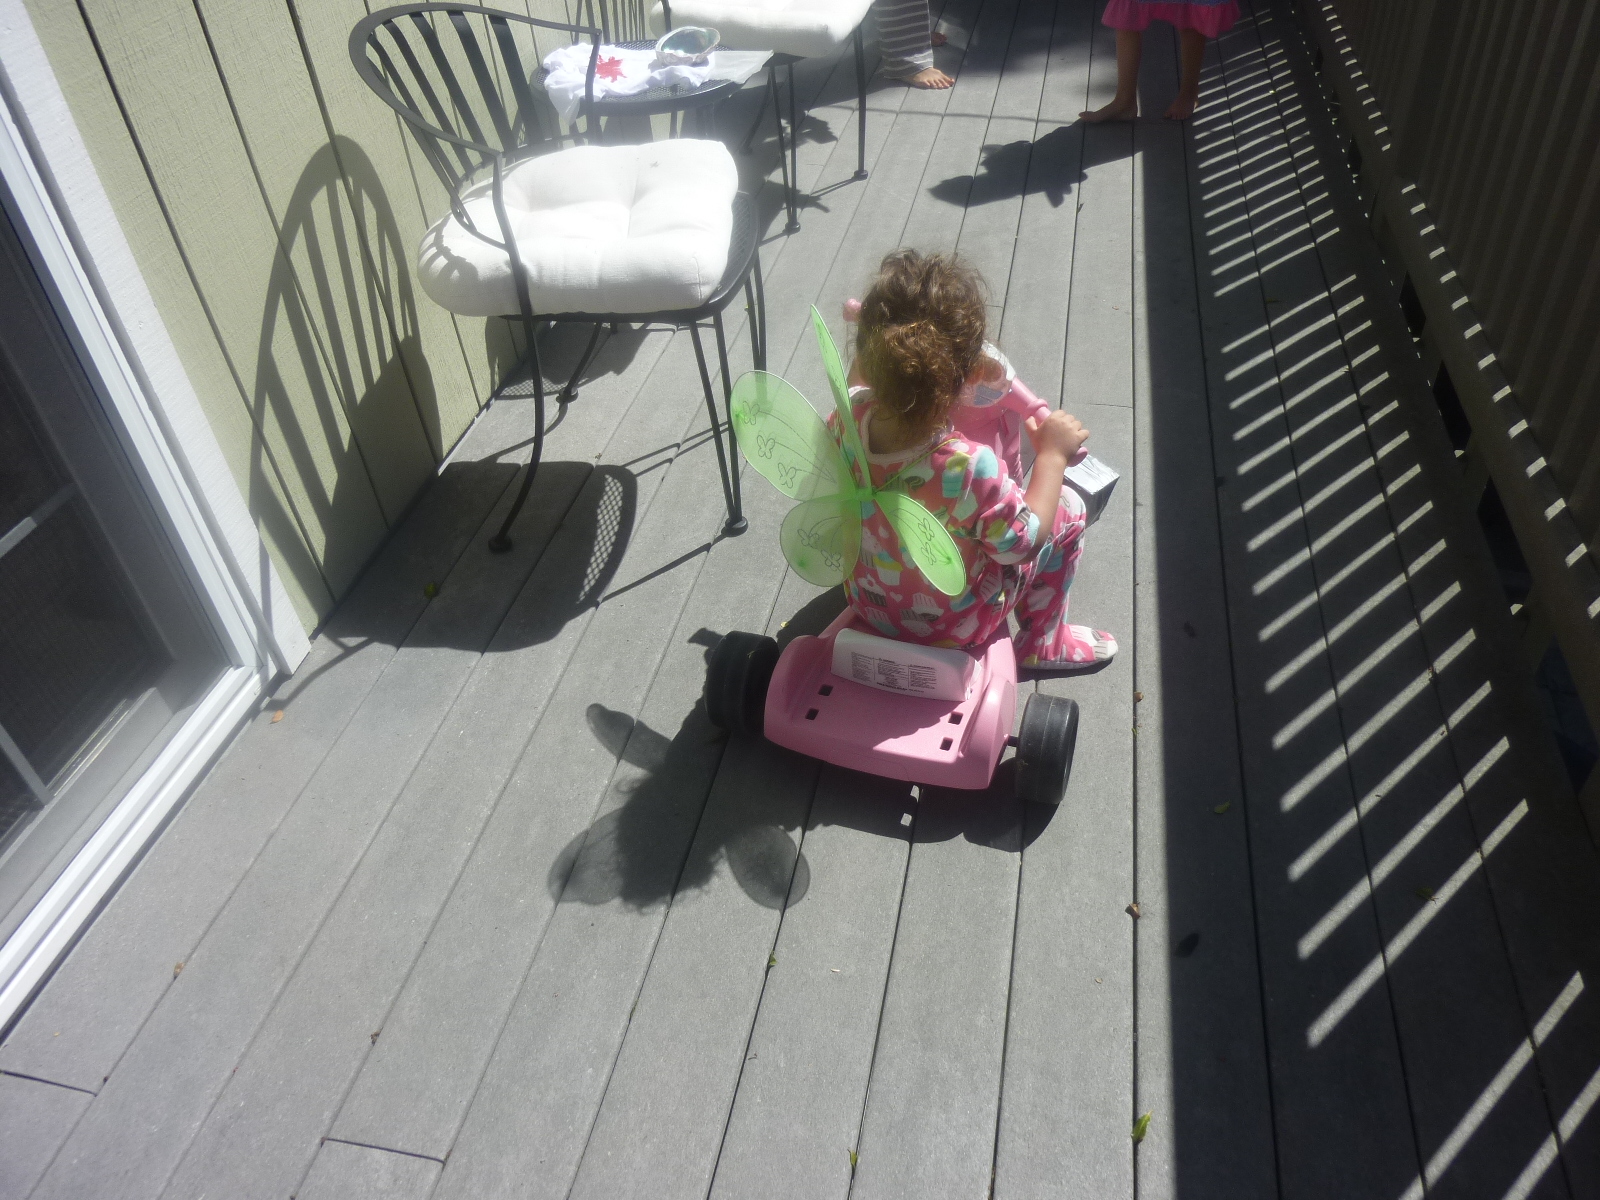
I combined fairy wings and jump ropes so that they looked like butterflies. The girls spent a lot of time on the deck playing with these.


The girls were quite proud of their creations and I enjoyed our crafting time together. And all the adults enjoyed not having bored, whiny kids around! Ha ha!

Join me at Inspire me Tuesday!

Thursday, June 20, 2013

Apricot Pie ( and no more apricots in my house!)

When I was a freshman in high school the summer job, for most of us that age, was working in the apricot drying yard. We would stand all day, in the heat, cutting, pitting and laying out on drying trays, boxes and boxes of apricots. I lasted two days. Right then and there I knew I wasn't cut out for a life of manual labor. I got me an office job at the local frozen food plant and I've not worked without air conditioning since!

I had recollections of my brief dry yard experience this week.  One of our clients gave us a box of just-picked apricots.  I've been cutting and processing the orange fruit all week now. Earlier in the week I made 24 jars of apricot jam. Today I baked an apricot pie and made pie filling for the freezer. I had a small bowl of apricots left over which I gave to my next-door neighbor.  I'm tired of looking at apricots right now!

Apricot pies are rather easy, don't require many ingredients. But don't let the simplicity fool you, they are so good. A little tart, a little sweet and really good with a scoop of  vanilla ice cream!


Fresh Apricot Pie

Pastry for 2-crust pie
5 1/2 cups sliced fresh apricots (about 2 pounds)
1 cup sugar
1/2 cup flour
1 tablespoon lemon juice (optional)
2 tablespoons unsalted butter, cut into small pieces

Preheat oven to 375 degrees.

Line pie plate with pie dough.

In a large bowl, combine apricots, sugar and flour (and lemon juice, if using); toss gently then spoon into crust and dot with butter.

Cover with top pie dough, seal, crimp edges and make slits in crust.

Place pie on foil-lined baking sheet and bake 50 to 60 minutes, or until crust is golden and juices are bubbling.

Tip:  For added flavor, sprinkle cinnamon-sugar over the pie crust just before baking.

I keep a container of cinnamon sugar in my pantry at all times.  Sprinkling over a pie crust is just one of its uses!


When making fruit pies I often make an extra batch or two of filling to freeze.  I already have a mess in the kitchen so it just involves a little more cutting. The reward is going to the freezer in the middle of winter, getting the pie filling and baking a fresh fruit pie!

To do so I put the fruit filling in a freezer ziploc bag, getting as much air out as possible (a Food Saver works great for this, too!) This is when I usually use lemon juice as it helps to keep the fruit from browning.  I then arrange in a pie pan (the same size you will use to bake the pie in) and freeze.  Once frozen, I remove the pie pan and stack the pie filling "discs" in the freezer.  When I'm ready to bake a pie I insert the frozen pie disc into the prepared pie dough.  Because they are frozen it may take a little longer for the pie to bake.

I'm linking up at Foodie Friday!