Tuesday, May 30, 2017

Sweet Cherry and Cornmeal Upside-Down Cake

I love when cherries are ripe but the season is so short! One week they are at the farm stands, the next week they are gone!  I try to cram as many cherry desserts in as possible before the juicy sweet fruit is gone for another year. I also happen to love upside-down cakes.  They are easy to make, impressive to present to guests, and adaptable to most any fruit. This recipe is a little different from most as the batter contains cornmeal.  It's not so much that it seems like you're eating a sweet cornbread but it definitely adds a little texture to the cake. The batter would work well with other stone fruits ripening later this summer, such as peaches, nectarines and plums.


A springform pan (also known as cheesecake pan) is used to make this cake.  This pan made it so easy to release the cake and invert onto a serving platter.  I had never thought to use a springform pan for an upside-down cake.  You learn something new every day!


I took this cake to my parents and it was devoured by all in attendance.  I served it with freshly whipped cream but a scoop of vanilla ice cream would be good, too!

Cherries, brown sugar, butter.  How can that not be good?

The cornmeal in the batter gives it a light yellow color and a soft crunchiness.

Sweet Cherry and Cornmeal Upside-Down Cake

1/3 cup firmly packed brown sugar
1/2 cup plus 3 tablespoons unsalted butter, softened, divided
3/4 teaspoon plus 1/8 teaspoon kosher salt, divided
1 1/4 pounds sweet cherries, pitted
3/4 cup granulated sugar
1 teaspoon finely grated lemon zest
2 large eggs
1 1/2 cups cake flour
6 tablespoons cornmeal
1 1/2 teaspoons baking powder
1/4 teaspoon baking soda
3/4 cup whole buttermilk
1 teaspoon vanilla extract
Vanilla ice cream or whipped cream, for serving

Preheat oven to 350 degrees.  Line a 9-inch springform pan with parchment paper, and butter pan and parchment.

In a medium saucepan, heat brown sugar, 3 tablespoons of the butter, and 1/8 teaspoon of the salt over medium heat.  Cook, whisking occasionally, until butter is melted and sugar is dissolved.  Pour mixture into prepared pan.  Arrange cherries in a single layer on top of butter mixture.

In the bowl of a stand mixer fitted with the paddle attachment, beat granulated sugar, zest, and remaining 1/2 cup butter at medium speed until fluffy, 3 to 4 minutes, stopping occasionally to scrape sides of bowl.  Add eggs, one at a time, beating well after each addition.

In a medium bowl, whisk together the flour, cornmeal, baking powder, baking soda, and remaining 3/4 teaspoon salt.  In a small bowl, stir together the buttermilk and vanilla.

Reduce mixer speed to low.  Gradually add flour mixture to butter mixture alternately with buttermilk mixture, beginning and ending with flour mixture, beating just until combined after each addition.  Spread batter onto cherries.  Firmly tap pan on counter to settle batter between cherries and release air bubbles.  Place pan on a baking sheet lined with parchment paper.

Bake until golden, puffed, and a wooden pick inserted in center comes out clean, 40 to 50 minutes, rotating pan and covering with foil halfway through baking to prevent excess browning. Let cool on a wire rack for 15 minutes.  Carefully remove ring; invert cake onto a serving board or platter.  Carefully remove parchment.  Serve warm with whipped cream or ice cream.

Recipe source: Bake From Scratch May/June 2017


Monday, May 22, 2017

Cherry Clafoutis

A clafoutis (pronounced "kla-foo-tee") is a rustic dessert from the south of France.  It's basically cherries in a thick crepe batter.  It's very easy to make.  Traditionally, the cherries aren't pitted as the pit releases an almond-like flavor when baked. Mine are pitted and I added a little dash of almond extract to compensate. 


The cherry season comes and goes real quick in central California. This is an easy and delicious treat to make when the cherries are available, though frozen cherries can also be used. It is best served warm and is especially good with a scoop of ice cream.


Cherry Clafoutis

4 eggs, separated
2/3 cup sugar, divided
6 tablespoons all-purpose flour
2 teaspoons vanilla extract
1/4 teaspoon almond extract
1 cup heavy cream
1/2 teaspoon salt
1 1/2 pounds fresh cherries, pitted
1/2 teaspoon grated lemon zest

Preheat oven to 375 degrees. Butter an 11-inch ovenproof fry pan or large baking dish.

In a bowl, stir together the cherries, 1/3 cup sugar and the lemon zest; set aside. 

In a large bowl, combine the egg yolks and the remaining 1/3 cup of the sugar. Using a handheld mixer, beat on medium-high speed until ribbons form, about 8 minutes (the mixture will turn to a cream color). Add the flour, vanilla and almond extracts, and cream.  Reduce the speed to low and beat until completely blended, stopping the mixer occasionally to scrape down the sides of the bowl.

In a small bowl, using a hand-held whisk, beat the egg whites and salt for about 30 seconds. Add the whites to the batter and beat with the mixer on low speed until incorporated, 1 to 2 minutes.

Preheat the prepared fry pan in the oven for 4 to 5 minutes.

Remove the pan from the oven, pour in the cherries and top with the batter.  Bake until the clafoutis is set in the middle, 30 to 35 minutes.  Serve warm with ice cream, if desired.

Wednesday, May 17, 2017

Rainbow Sprinkle Bread with Birthday Cake Crumb Topping

Our 6-year old granddaughter spends almost every Friday night with us and has since she was born.  I do most of the work of taking care of her, playing with her, bathing her, etc. (with no complaints!) However, she and her Papa have a valued Friday night tradition, that of a scoop of ice cream after dinner, with caramel sauce and sprinkles, along with a few giggles.  For some reason, no one does this as good as Papa!  I'm tasked with making sure we always have the necessary supplies, especially the sprinkles.

The latest Bake From Scratch magazine has an article on baked goods with sprinkles. As I had all the ingredients (including the sprinkles!) I made this recipe one afternoon. It's very reminiscent of a pound cake, just not as heavy.  It's quite good! I think it would make an excellent cake for strawberry shortcake. My husband was gone for the weekend so I ate a slice then sent the rest of the cake home with my son and his family.  It's too tempting to have such a nice treat laying around my kitchen! I've added rainbow sprinkles to my grocery list as the recipe used almost an entire large jar.  I'll be in real trouble if there are no sprinkles for Friday night!


Rainbow Sprinkle Bread with Birthday Cake Crumb Topping

1 cup unsalted butter, softened
1 1/2 cups granulated sugar
4 large eggs
1 large egg yolk
1 tablespoon clear vanilla extract ***
2 cups all-purpose flour
1/2 teaspoon kosher salt
1/3 cup rainbow sprinkles
Birthday Cake Crumb Topping (recipe follows)

Preheat oven to 325 degrees. Spray a 9x5-inch loaf pan with baking spray with flour; line with parchment paper, letting excess extend over sides of pan.  Spray pan again.

In the bowl of a stand mixer fitted with the paddle attachment, beat butter and sugar at medium speed until fluffy, 3 to 4 minutes, stopping to scrape sides of bowl. Add eggs and egg yolk, one at a time, beating well after each addition.  Beat in vanilla.

In a medium bowl, whisk together flour and salt.  Reduce mixer speed to low, and gradually add flour mixture to butter mixture, beating just until combined. Stir in sprinkles. Pour batter into prepared pan.  Sprinkle with Birthday Cake Crumb Topping.

Bake until golden brown and a wooden pick inserted in center comes out clean, about 1 hour and 10 minutes.  Let cool in pan for 10 minutes. Using excess parchment as handles, remove cake from pan, and let cool completely on a wire rack.

*** Clear vanilla extract makes a difference in the color of the bread.  I used my homemade extract and the bread was still a nice white color.

Birthday Cake Crumb Topping

1/4 cup all-purpose flour
1/4 cup granulated sugar
1/8 teaspoon kosher salt
2 tablespoons cold unsalted butter, cubed
1/3 cup rainbow sprinkles
1/2 teaspoon clear vanilla extract

In a large bowl, whisk together the flour, sugar, and salt.  Using your fingers, work in cold butter until mixture has a sandy texture. Add sprinkles and vanilla, and mix with your fingers until small pebble-size crumbs remain. Refrigerate for up to 3 days.

Sunday, May 14, 2017

Pane Bianco

I love sun-dried tomatoes and use them a lot in recipes.  This bread recipe is filled with sun-dried tomatoes, fresh basil, garlic and shredded cheese.  It is a very flavorful addition to an Italian-style meal.  I especially enjoyed it the next day, toasted, for my BLT sandwich. Don't let the shaping instructions intimidate you, the dough is very easy to work with and, when done, you have a uniquely-shaped loaf of bread. For full disclosure, I did cut the dough wrong, I cut the loaf crosswise instead of lengthwise.  It still made for a nice presentation. 


Pane Bianco

3 cups bread flour
1 package (2 1/4 teaspoons) yeast
1 1/4 teaspoons salt
1 large egg
1/2 cup lukewarm milk
1/3 cup lukewarm water
3 tablespoons olive oil
3/4 cup shredded Italian-blend cheese or the cheese of your choice
1/2 cup oil-packed sun-dried tomatoes
3 to 6 cloves garlic, peeled and minced
1/3 cup chopped fresh basil

Combine the flour, yeast, salt, egg, milk, water, and olive oil in a large bowl (or in the bucket of your bread machine), and mix and knead, either by hand, using a mixer, or in your bread machine set on the dough cycle, to make a smooth, very soft dough.  The dough should stick a bit to the bottom of your bowl if you're using a stand mixer. (I mixed mine in my bread machine).

Place the dough in a lightly greased bowl, cover, and let it rise until it's doubled in size, about 45 to 60 minutes.

Meanwhile, thoroughly drain the tomatoes, patting them dry. Use kitchen shears to cut them into smaller bits.

Gently deflate the dough.  Flatten and pat it into a 22 x 8 1/2-inch rectangle.  Evenly spread the cheese, tomatoes, garlic, and basil over the dough.

Starting with one long edge, roll the dough into a log the long way. Pinch the edges to seal.

Place the log seam-side down on a lightly greased or parchment-lined baking sheet.

Using kitchen shears, start 1/2 inch from one end and cut the log lengthwise down the center about 1-inch deep, to within 1/2 inch of the other end.

Keeping the cut side up, form an "S" shape. Tuck both ends under the center of the "S" to form a "figure 8", pinch the ends together to seal.

Cover and let rise in a warm place until double, 45 to 60 minutes.

While the loaf is rising, preheat the oven to 350 degrees.

Uncover the bread and bake it for 35 to 40 minutes, tenting it with foil after 20 to 25 minutes to prevent overbrowning.

Remove the bread from the oven, and transfer it to a rack to cool.  Enjoy warm or at room temperature. Store, well-wrapped, at room temperature for a couple of days.

Recipe source:  Red Star Yeast


Perhaps I should hone my reading comprehension skills.  The recipe clearly says to make a lengthwise cut, I cut crosswise! Oh, well, it still tasted great!

Thursday, May 11, 2017

Tissue Paper Hydrangea

Many parts of my life I keep very simple.  One of those areas is gift wrapping.  I don't like storing a bunch of different paper and bags or running to the store at the last minute when I have a gift to wrap and nothing to wrap it with. Consequently, I have developed a system that works for me.  I stock up on brown kraft bags of various sizes and brown kraft wrapping paper.  With the exception of Christmas (where I use the same paper throughout the season), virtually all of my gifts are wrapped in craft paper. It is so versatile and can be used for any occasion, especially when embellished with a little ribbon and decorated. That's the fun part for me, decorating the package. (I know, you're thinking that her gift wrap system is simple but she complicates it with decorating!)


While browsing Pinterest (gosh, I love that site!) I found a tutorial to make hydrangea flowers from tissue paper. As I have a wedding to attend and it's spring, I thought this would make an ideal decoration for the wedding gift. It was so easy to make, very reminiscent of making tissue paper pom poms. I'm quite happy with the results! Sometimes a girl just has to create and these flowers were quick and easy to do!


There are many tutorials for making these tissue flowers.  This is the one I used.

Monday, May 8, 2017

No-Knead Crusty Bread


A few years back a cookbook came out called Artisan Bread in 5 Minutes a Day. I bought it and tried the bread, with great results.  It involved making a quick yeast dough by stirring the ingredients together, leaving it out on the counter for a few days, then refrigerating.  Whenever you wanted to make a loaf of bread, rolls, or pizza, you cut off a chunk of dough and baked (usually on a hot pizza stone). There was no kneading involved. It was great bread.  However, it made a lot of dough, and took up a lot of room in the fridge. If I was super busy and didn't make bread on a frequent basis, it would spoil.

As the bread was very good, I was intrigued when I saw recipes to make one loaf at a time in a Dutch Oven. This past weekend I decided to try it.  We were in our RV at the racetrack so I made sure to pack a 3.5 qt. Dutch Oven. I mixed the dough on Friday night, Saturday night I shaped it into a ball and baked it. It was one of the best breads I've ever eaten! It has a crusty and chewy texture to it, very similar to a loaf of sourdough bread. We devoured half the loaf with our tri tip dinner then I sliced the rest for toast in the morning.  It could not have been easier to make. I will make this bread again and again.


No-Knead Crusty Bread

3 cups all-purpose flour
1 3/4 teaspoon salt
1/2 teaspoon active dry yeast
1 1/2 cups water, room temperature

In a big bowl, mix the flour, salt and yeast together. Pour the water into the bowl and, using a spatula or wooden spoon, mix it until well incorporated.

Cover the bowl with plastic wrap and let it sit on your counter for 12 to 18 hours.

Preheat oven to 450 degrees.  Add your Dutch Oven pot to the oven as it's heating and heat it as well until it's at 450 degrees.

Remove the pot from the oven and remove the lid from it. If you want to make sure your bread doesn't stick to the pot you can sprinkle some flour or cornmeal on the bottom of the pot.

Flour your hands really well and also sprinkle a bit of flour over the dough. With your floured hands gently remove the dough from the bowl and roughly shape it into a ball.  Take the ball of dough and drop it into the pot.  Cover the pot with the lid and place it back in the oven.

Bake for 30 minutes with the lid on, after which remove the lid and bake for another 15 to 20 minutes until golden brown.

Remove the bread from the pot, it should fall out easily.  Let cool before slicing it.

Notes:

A small (3.5 qt.) Dutch Oven is better so that the bread rises upwards.  Larger Dutch Ovens will cause the bread to spread out over the surface of the pot.

If the dough mixture is too dry, add a bit more water.  The dough should be sticky.

To add other ingredients to the bread such as dried fruit, seeds, herbs or cheeses, add them when mixing in all the ingredients.
 
After sitting for 12 to 18 hours, the dough is very spongy and sticky, very similar to a sourdough starter.
 

Friday, May 5, 2017

Creamy Lemon Risotto with Asparagus

This recipe comes from the Williams Sonoma Taste Blog.  My Hubbers loves risotto, we both love asparagus and lemon, so it quickly went to the top of the "things I want to make" list.


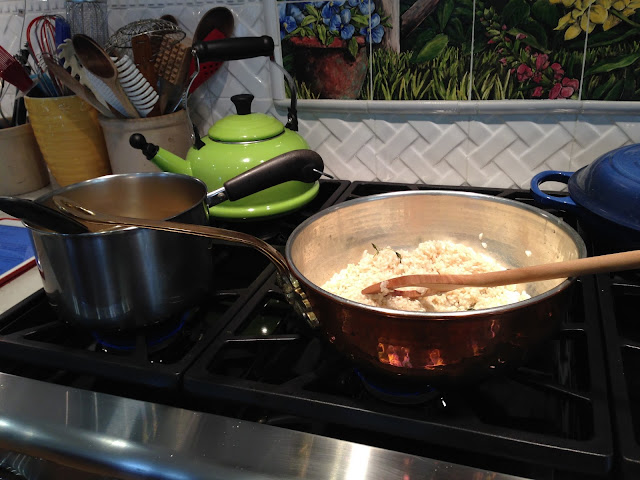
It's a great risotto, one I will make again. I'm hoping the next time I make it things will go smoother.  If it could go wrong, making this dish, it did! We are leaving for the race track in the morning.  Our motorhome and my race car are parked in front of our house. I am taking items from home and transferring them to the RV, in our above-normal 90-plus degree weather! I had to pick my granddaughter up from school, feed her a snack, and take her to gymnastics. In the meantime, a floor installer stopped by to measure the RV as we are going to replace some of the carpet with laminate wood flooring. This was probably not the night to try a new recipe!  I didn't have shallots, though I could swear I bought some (did they stay in the grocery cart?)  I ended up adding a little garlic and onion salt to compensate. When it came time to put the wine in, I accidentally put the lemon juice in instead, even though I hadn't gotten the seeds out of the juice yet. So, the wine got added in later! I didn't have as much cream as the recipe called for. You would think I was a beginner in the kitchen!  But, it's obviously a very forgiving recipe; it has a nice lemon flavor and the cream gives the risotto an extra creaminess. It's a light and fresh-tasting spring risotto.


Creamy Lemon Risotto with Asparagus

1 lb. asparagus, ends trimmed
1 tablespoon unsalted butter
1 tablespoon extra-virgin olive oil
1 shallot, finely chopped
3 fresh thyme sprigs
2 cups Arborio rice
Fine sea salt and freshly ground black pepper
1/4 cup dry white wine
6 cups chicken broth, heated to a simmer
2 teaspoons finely grated lemon zest
1/2 cup heavy cream
1/2 cup grated Parmesan cheese
2 tablespoons fresh lemon juice
2 tablespoons minced fresh flat-leaf parsley

In a microwave-safe bowl, combine the asparagus and 2 tablespoons water. Cover loosely with plastic wrap and microwave on high until the spears are crisp-tender, about 2 minutes. Alternatively, place the asparagus in a steamer basket and set over a saucepan of simmering water. Cover and steam until the spears are tender-crisp, 3 to 4 minutes. Cut into 1-inch pieces and set aside.

In a large, heavy saute´pan over medium heat, melt the butter with the olive oil. When the butter has melted, add the shallot and cook, stirring often, until starting to soften, about 5 minutes. Stir in the thyme sprigs and cook until the shallot is softened and translucent, about 3 minutes longer.

Add the rice and 1 teaspoon salt to the pan, stirring to coat the grains of rice with the butter and oil.  Raise the heat to medium-high, pour in the wine and stir until absorbed. Reduce the heat to medium and add a ladleful of hot broth.  Cook, stirring often, until the broth is absorbed. Reduce the heat to medium-low if necessary to maintain a gentle simmer. Continue to cook the risotto, adding the broth a ladleful at a time and stirring until it is absorbed, until the rice is tender but still pleasantly chewy, about 20 minutes.

Stir in the reserved asparagus, lemon zest, cream, and cheese. Then stir in the lemon juice and a final ladleful of broth to achieve a creamy texture. The risotto should not be too stiff or too runny; it should mound softly on a spoon.  Sprinkle with the parsley, season with pepper and serve immediately.

Making risotto isn't difficult but it does require some patience as you continually add broth, stir until it's absorbed, and add some more until you get a creamy mixture.


Tuesday, May 2, 2017

Embroidered Lavender Napkins

Whenever I see plain white napkins on sale I usually buy a few.  They make a great medium for an upgraded linen.  A little ric rac, lace, buttons, or embroidery and you have a beautiful, and inexpensive, table linen. They make great hostess, wedding shower, or wedding gifts. I think cloth napkins add so much to a table setting, it makes the dinner feel a little more special. I've been gathering items to do a lavender table setting (still looking for the perfect plates!) so wanted to do some embroidered napkins.  I found a picture I liked, copied it and traced on the napkin.  I started embroidering them on Super Bowl Sunday.  Tax season got in the way and they sat in my craft room for a few months.  Now that tax season is over, I whipped six of them out in a matter of hours! Super easy and very pretty!


I have an Amazon credit card and use it for everything; groceries, clothing, travel, etc. I log online every few weeks and pay the charges so I don't incur interest (heaven forbid an accountant pay finance charges!)  The bonus for doing this is the Amazon points I accumulate.  I use these points to buy items that I wouldn't ordinarily spend money on, they are kind of my "splurge" points. With some of my points I bought this light box.  The rendering you want to trace is placed on the box, the light backlights it making it easy to trace the design onto fabric or paper.  It made tracing my design on these napkins so easy!